Configure Public Key Authentication for SFTP using Bitwarden SSH Agent
Public-key authentication using Bitwarden SSH Agent allows you to connect to a remote server without a password. Instead of passwords, you use a pair of keys (private and public) for authentication. The private key is kept secret, while the public key is shared with the server.
Warning
Integration with Bitwarden is currently not working as expected. Refer to #16983.
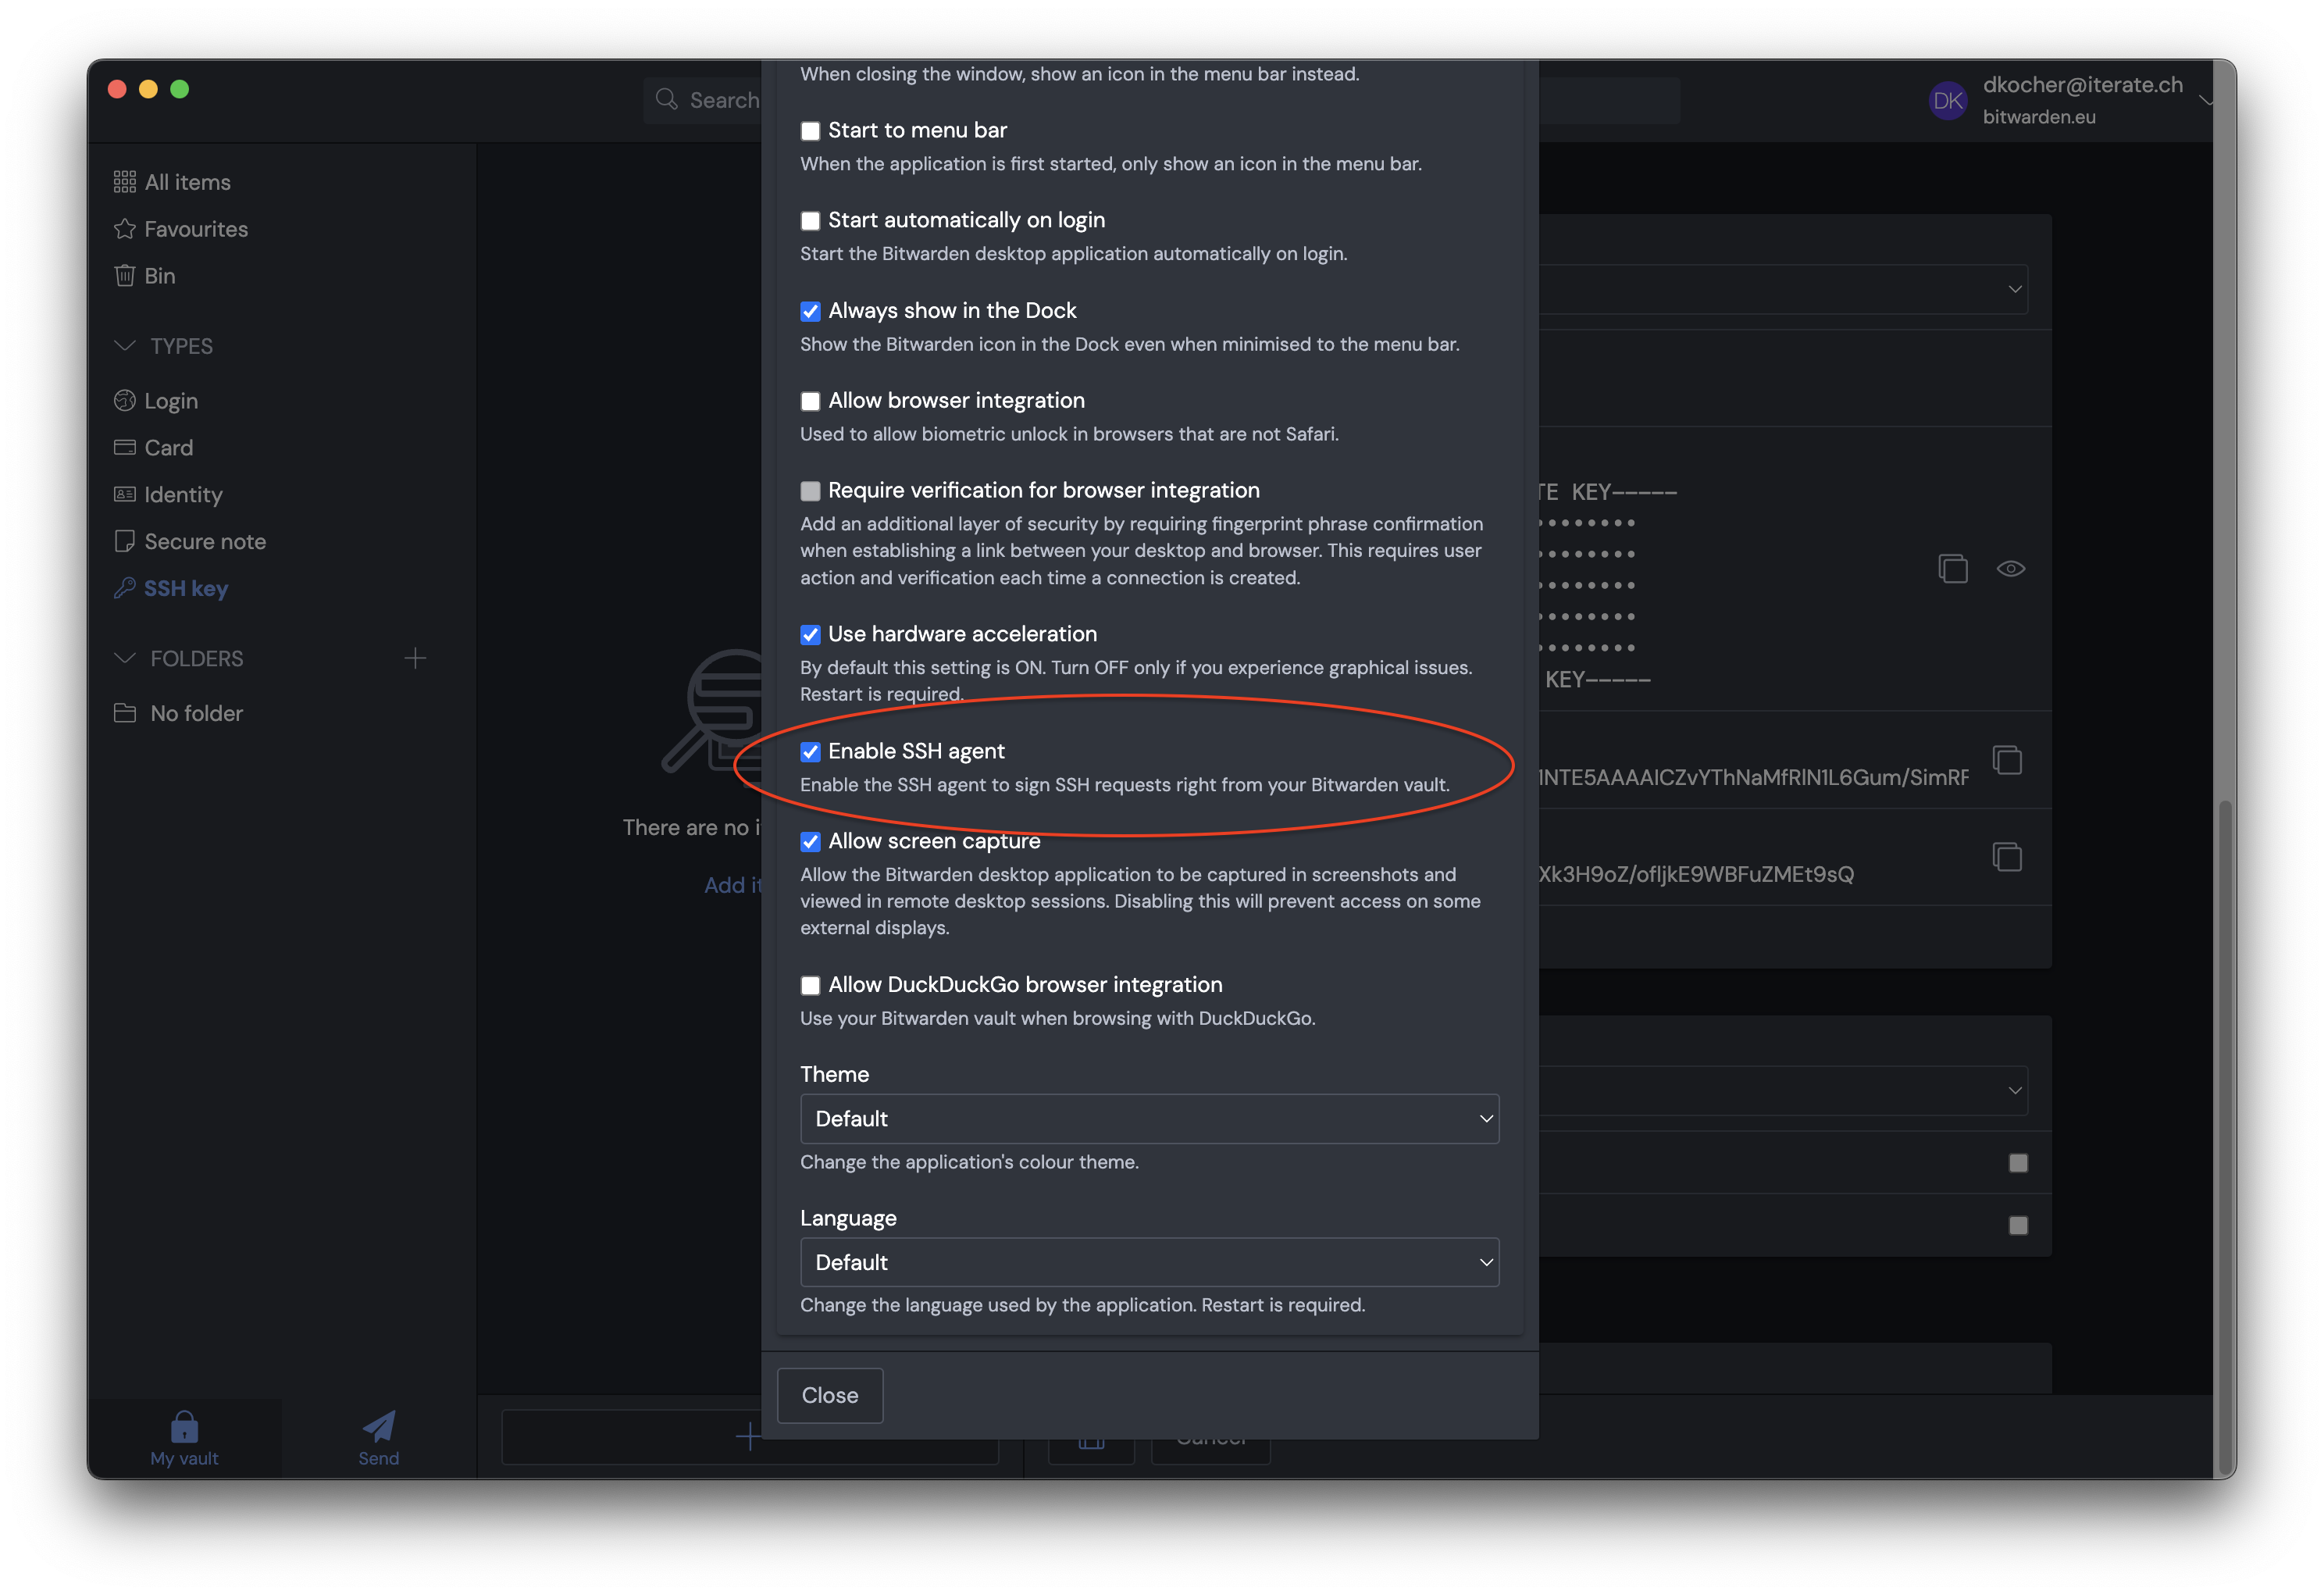
Ensure you have configured Bitwarden to manage your SSH keys. For more information, refer to Bitwarden SSH Agent. Open Bitwarden → Settings… and select the checkbox Enable SSH Agent.
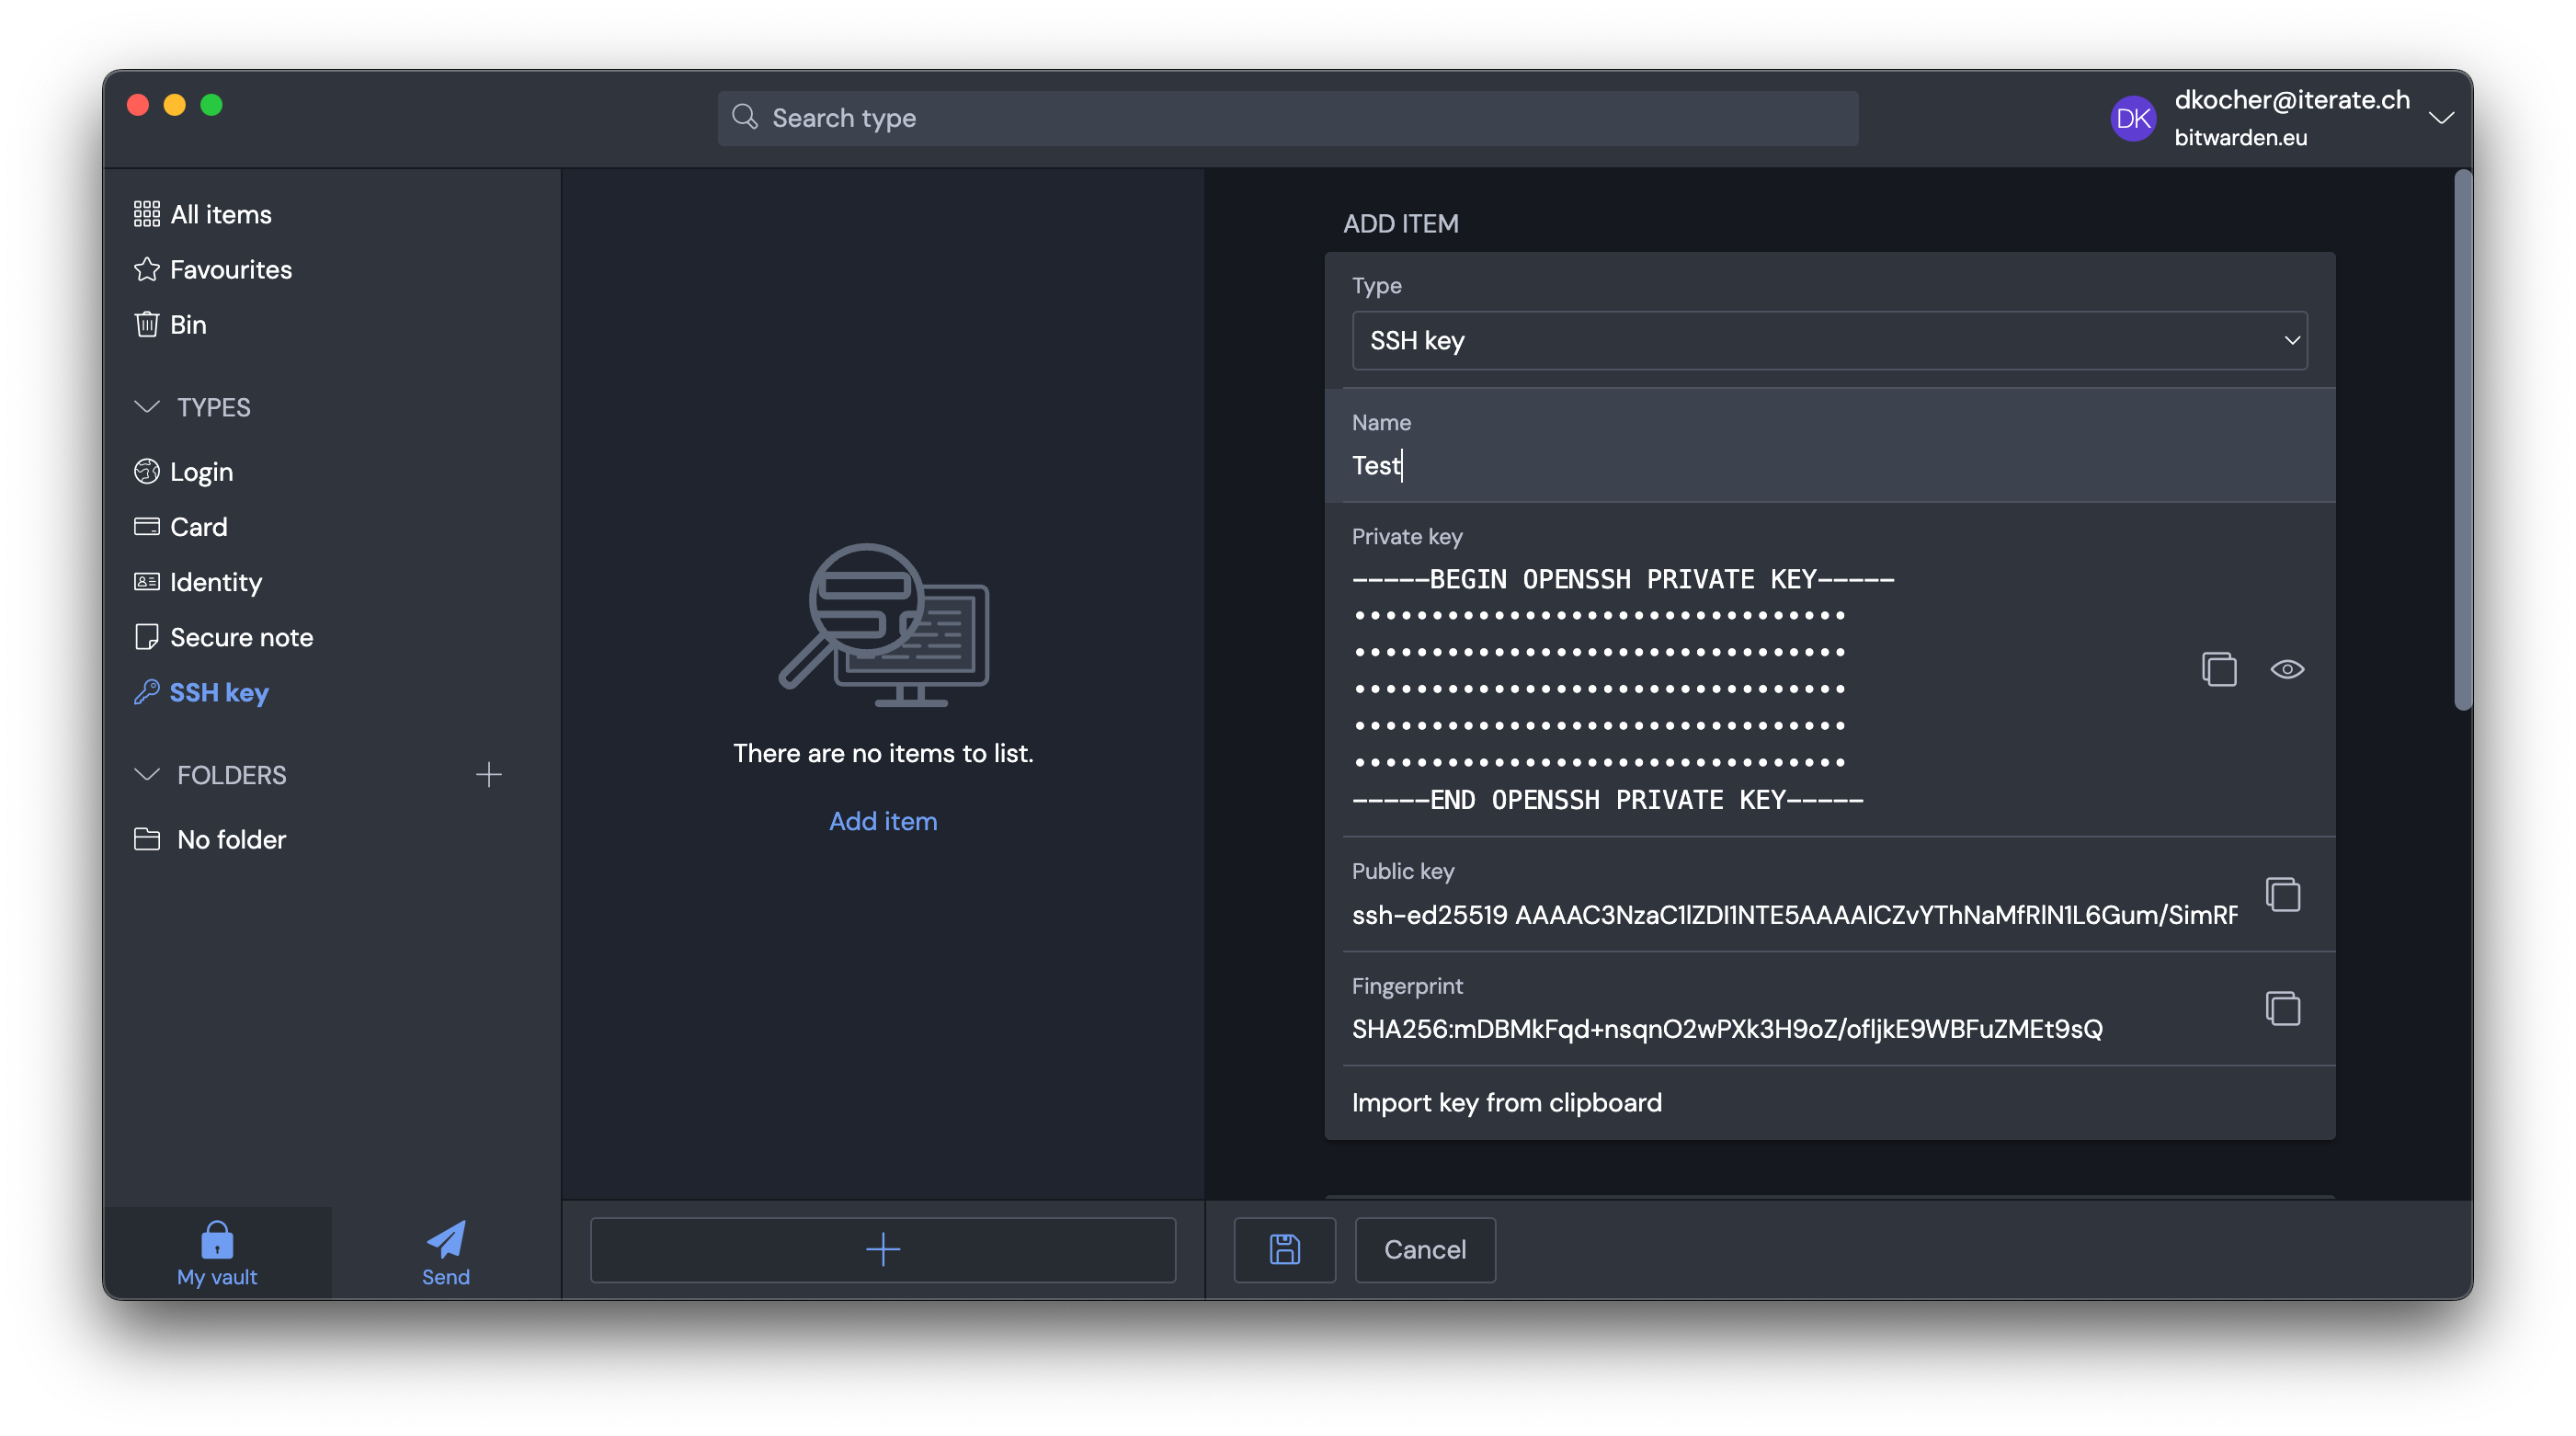
Create a new SSH key in Bitwarden and copy the Public key to the clipboard.
Confirm the Bitwarden SSH Agent is running as expected by attempting to list available SSH keys with
SSH_AUTH_SOCK=~/.bitwarden-ssh-agent.sock ssh-add -l
Add the public key copied from 1Password to the
authorized_keysin your~/.sshdirectory on the server running OpenSSH.pbpaste | ssh user@remotehost 'cat >> .ssh/authorized_keys
Open the OpenSSH configuration file
~/.ssh/configand add the following configuration specifying to use Bitwarden as the SSH agent:Host * IdentitiesOnly yes # Bitwarden SSH agent IdentityAgent ~/.bitwarden-ssh-agent.sock
This configuration directive is supported by Cyberduck and Mountain Duck.
Tip
If you are running Bitwarden installed from the Mac App Store the socket is located in
~/Library/Containers/com.bitwarden.desktop/Data/.bitwarden-ssh-agent.sockinstead. Make sure you are running a version of Bitwarden that has #13075 resolved.Add a new Bookmark in Cyberduck or Mountain Duck. Enter the alias from your OpenSSH configuration or the hostname in Server. You do not need to set a value for Password.
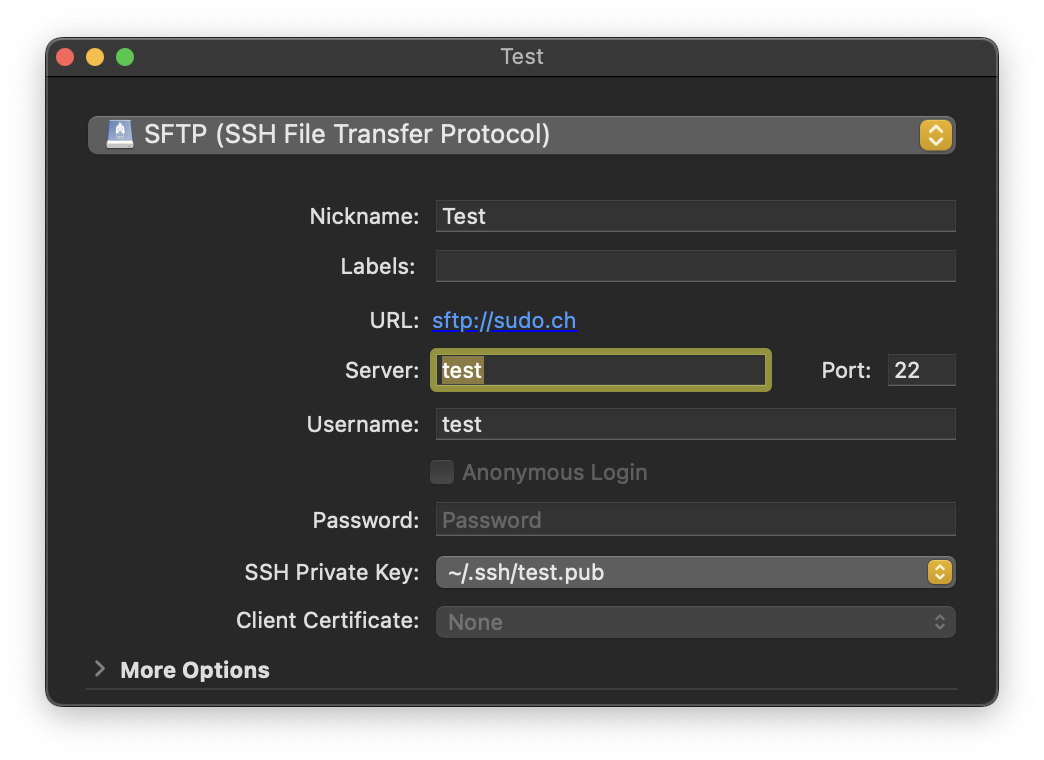
Tip
The server may respond with Too many authentication failures when trying to authenticate with all keys stored in 1Password. In the Bookmark panel, select the public key corresponding to your SSH private key saved in 1Password for SSH Private Key. The public key must be available as a file you can write from the clipboard to a file using:
pbpaste > ~/.ssh/test.pub
Alternatively, add the public key to the OpenSSH configuration file
~/.ssh/configwith theIdentityFiledirective# Public Key File used to filter identities from SSH agent IdentityFile ~/.ssh/test.pub
The public key selected allows to identify the corresponding private key retrieved from the SSH agent.
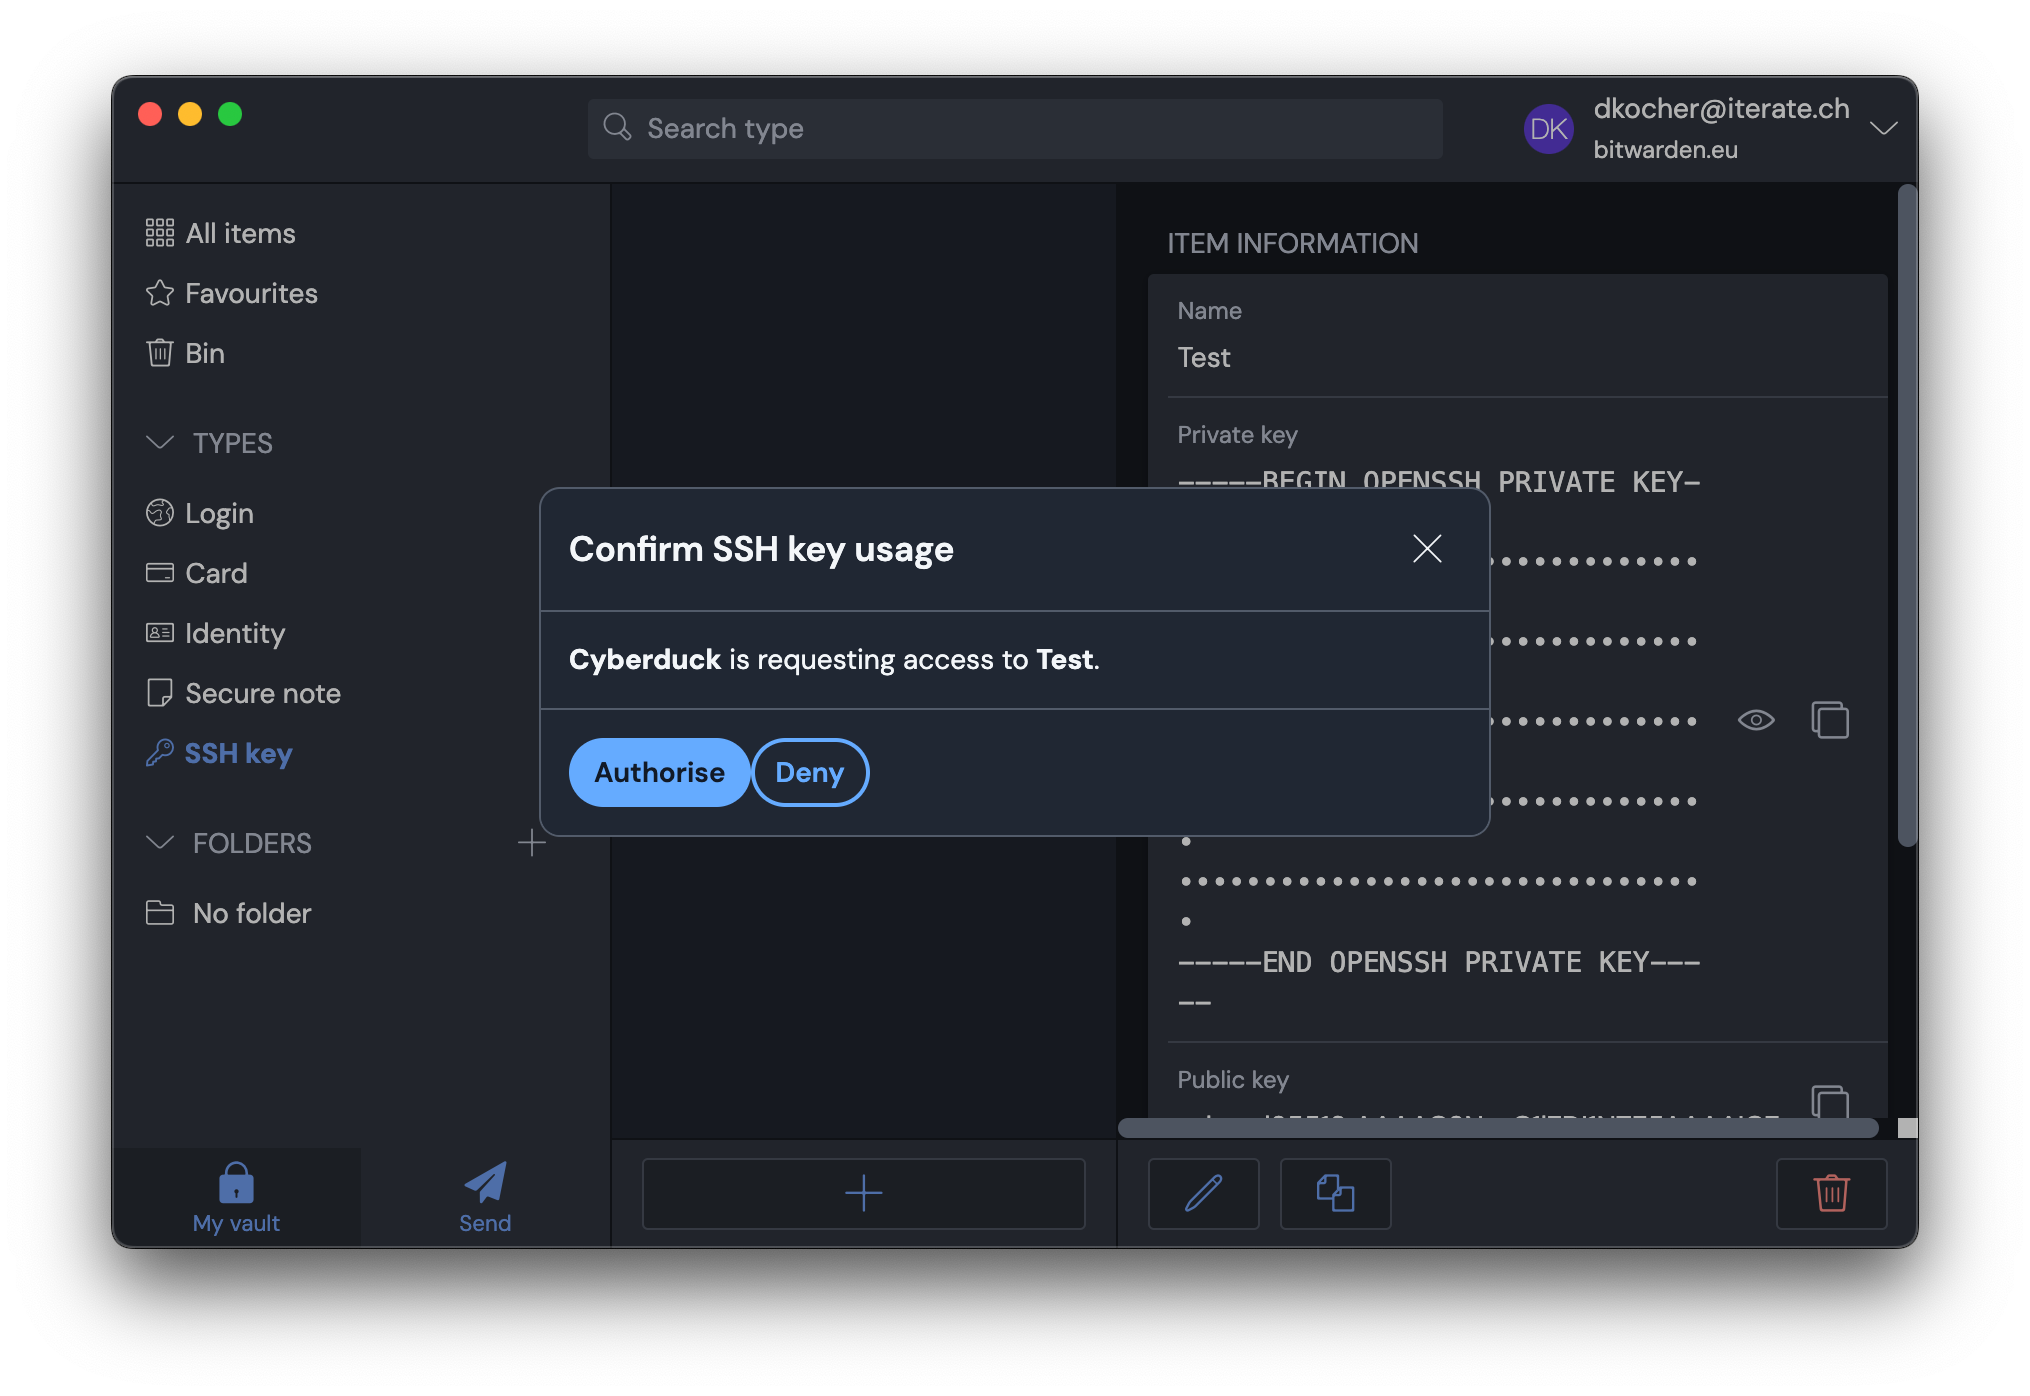
Connect to the server and acknowledge the prompt to use the private key stored in Bitwarden.