Setup a Custom OAuth Client ID for Google Drive & Google Cloud Storage
This is a step-by-step tutorial to connect with a custom OAuth 2.0 Client ID for Google Cloud Storage and Google Drive.
Application blocked by Google
Workaround to register your own Custom OAuth 2.0 Client ID for Google Cloud Storage and Google Drive and use it with a custom connection profile instead when encountering This app is blocked error when accessing Google Drive or Google Cloud Storage.
Register Client ID
Log in to Google Cloud Resource Manager and create a new project. You will be prompted to select a name of the project.

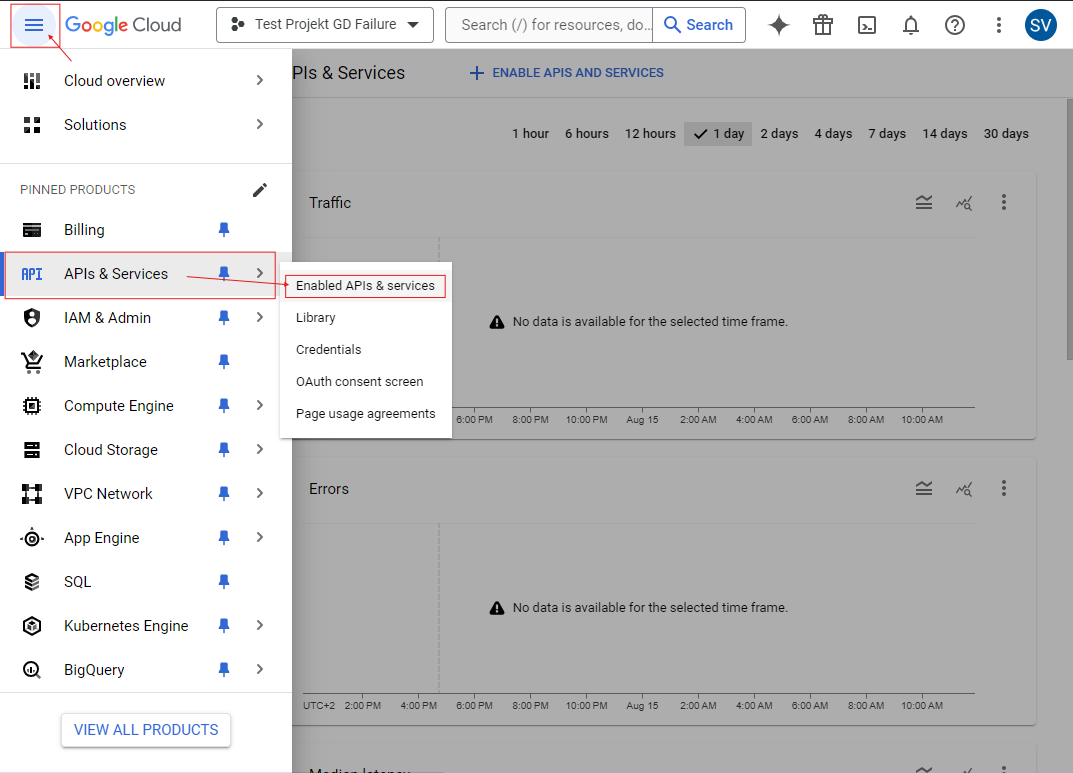
Navigate to APIs & Services → Enabled APIs & services.
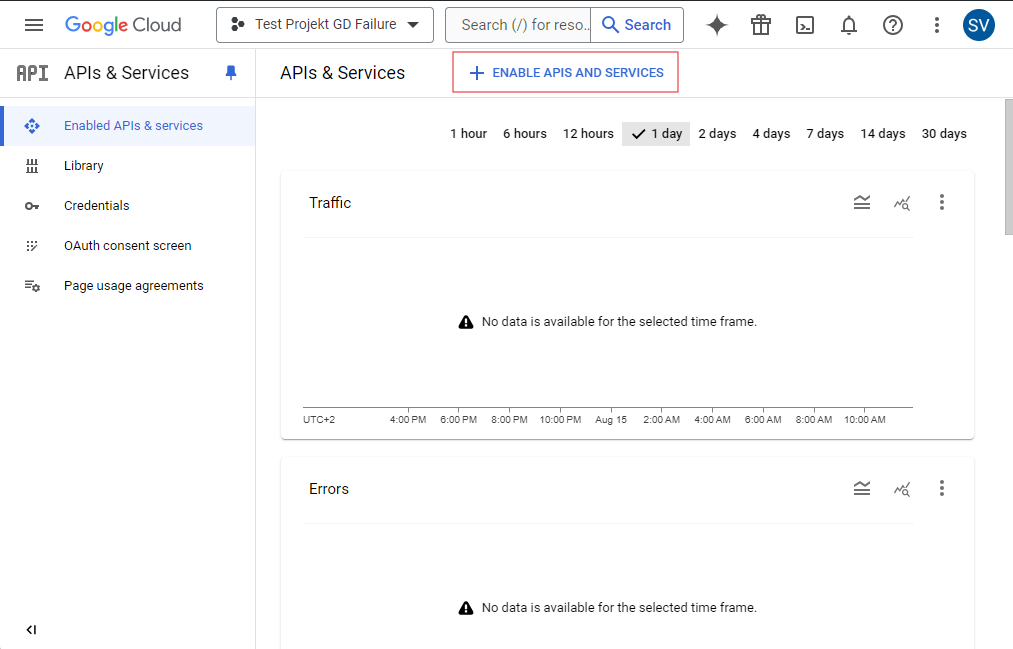
Select Enable APIs & Services and search for “Google Drive API” in the search box of the API library.
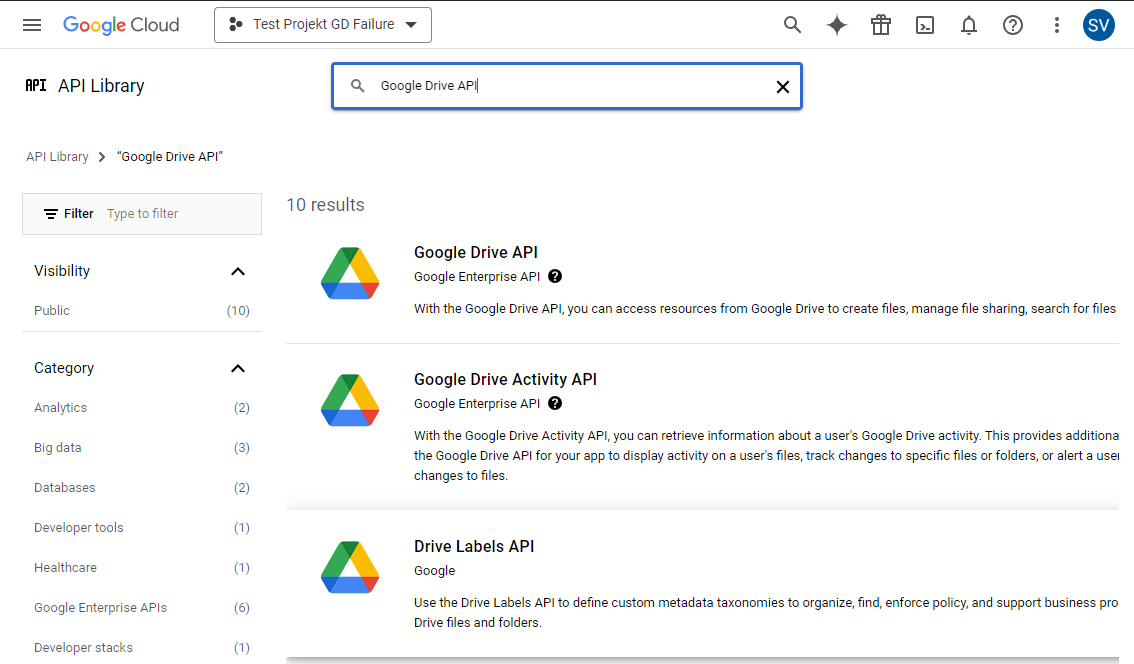
Select Google Drive API from the search results and choose Enable. Repeat the same for Google Cloud Storage JSON API when you want to access Google Cloud Storage.
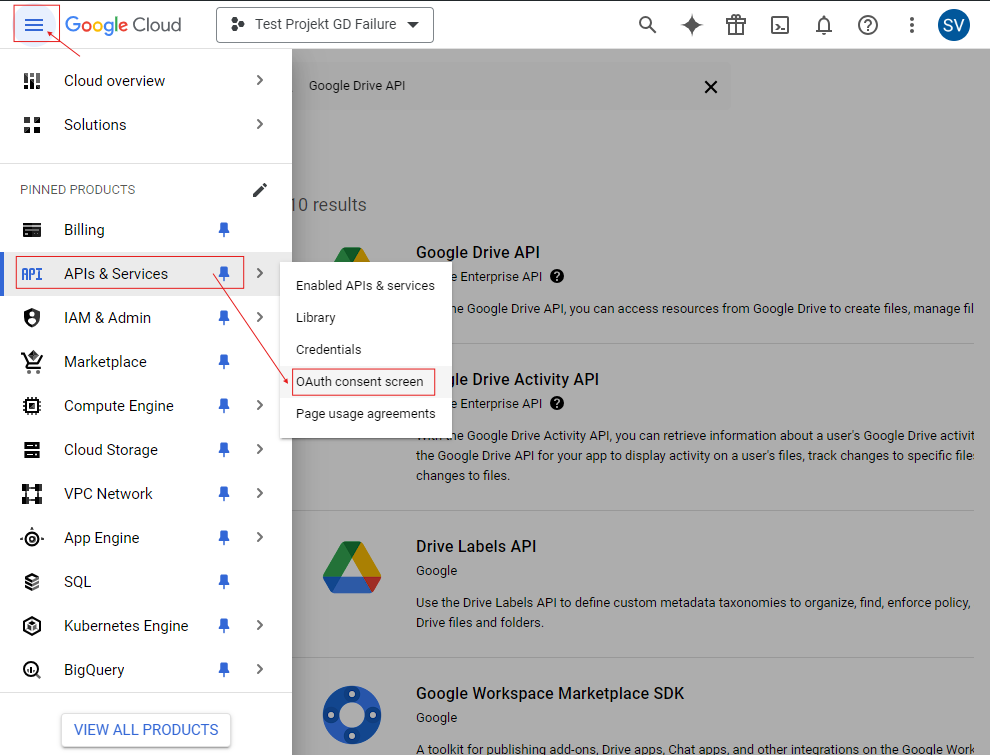
Navigate to APIs & Services → OAuth consent screen.
Choose External from User Type and select Create. Choose any App Name and select Save and Continue.
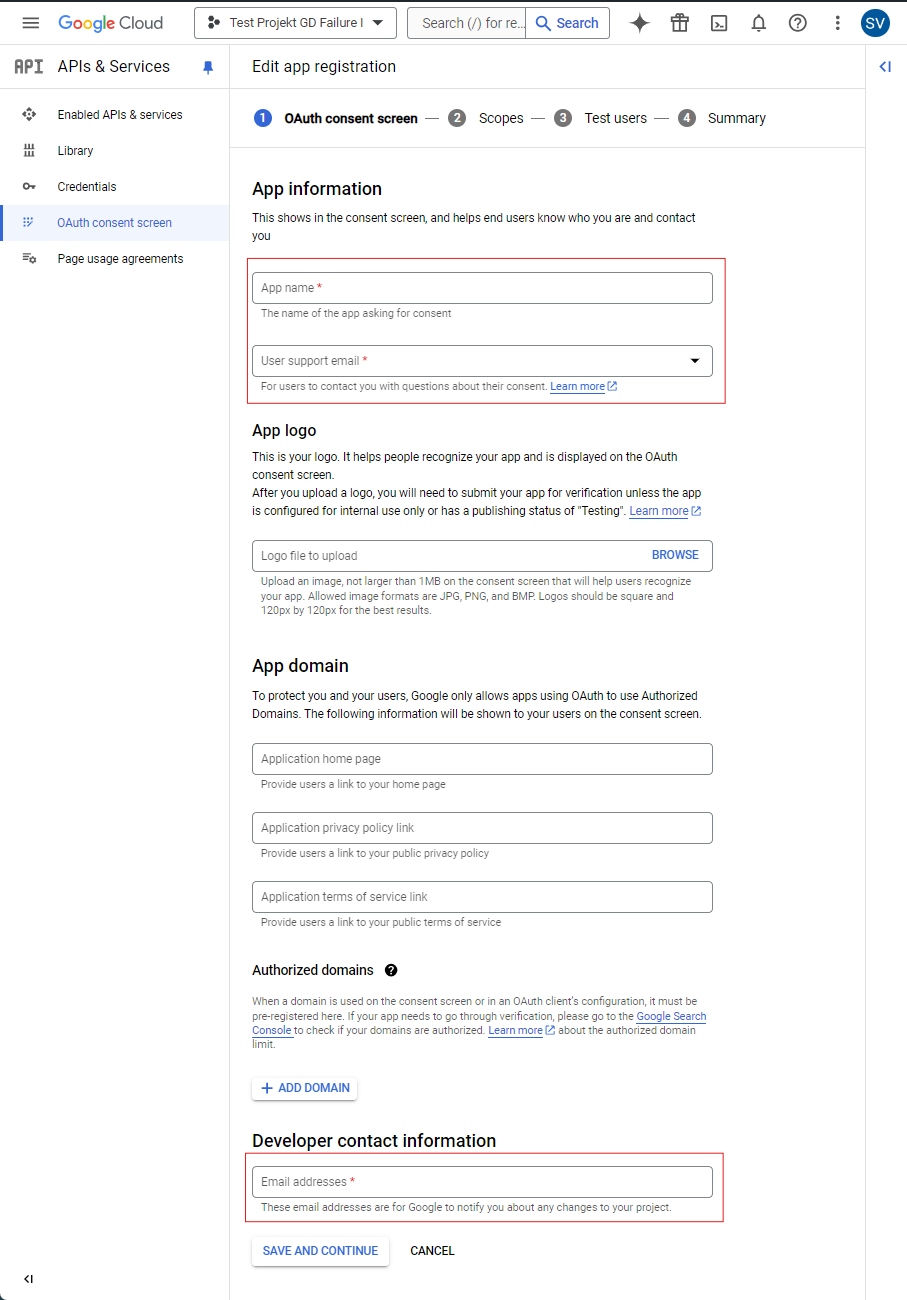
Select Add or Remove Scopes in the next step. Search for “Google Drive API” and enable the scope
.../auth/drive. Repeat the same for.../auth/devstorage.full_controlwhen you want to access Google Cloud Storage. Select Update to confirm and Save and Continue to move to the next step.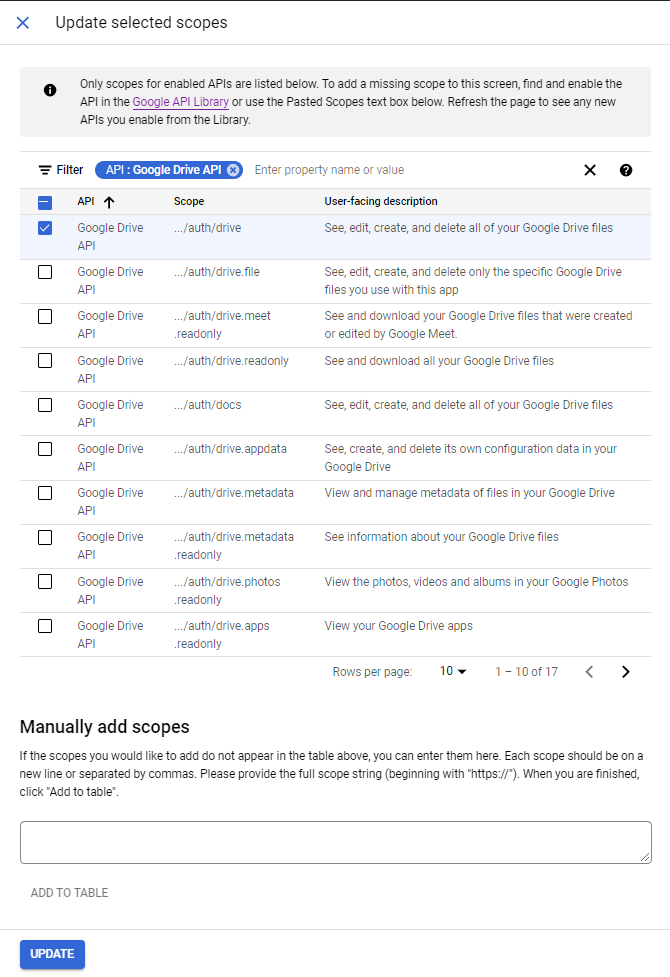
Add an email address registered as a Google account after selecting Add Users. Confirm by selecting Save and Continue.
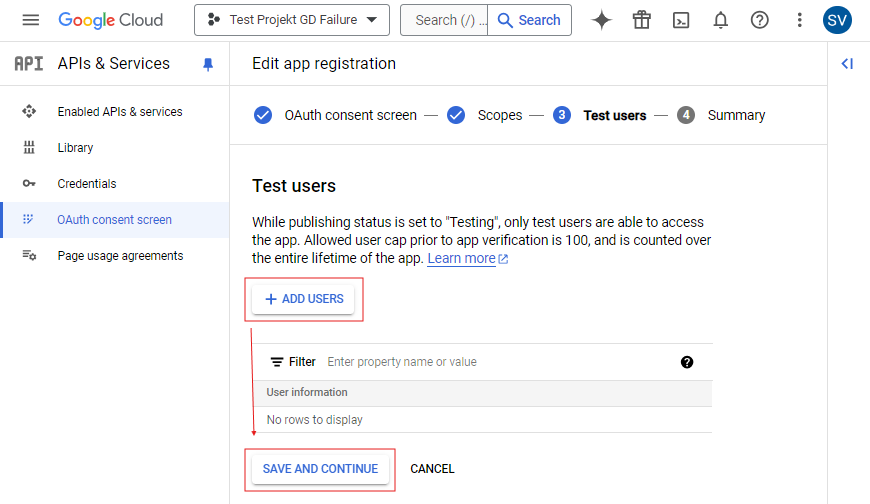
Navigate to APIs & Services → Credentials and select OAuth client ID from Create Credentials.
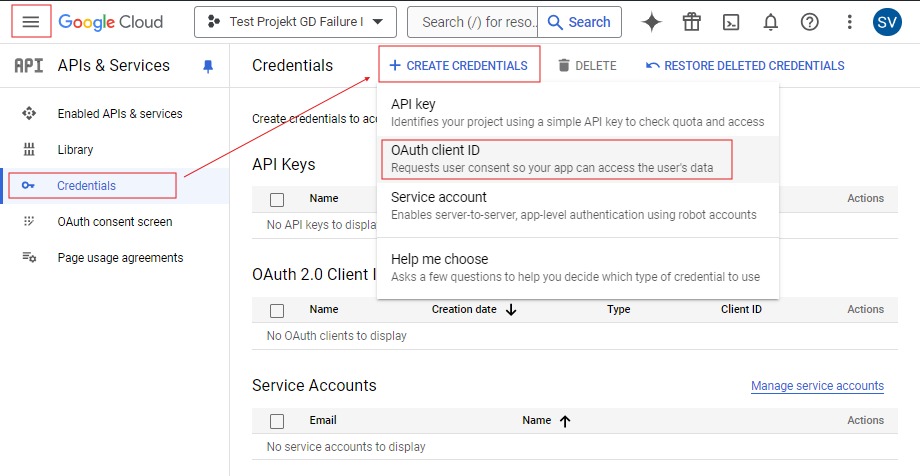
Select iOS for Application type and enter any Name. Select Create to continue.
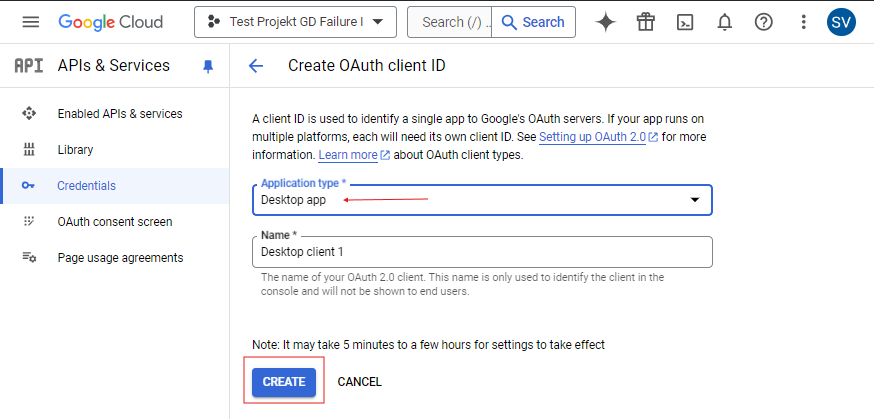
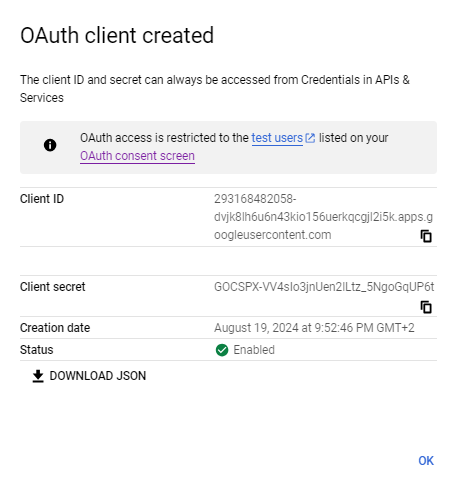
Copy the Client ID displayed. You will need it to set up the custom connection profile in the next step.
Add Custom Connection Profile
Download the template for Google Drive or Google Cloud Storage:
Use the OAuth Client ID created to edit the
OAuth Client IDandOAuth Redirect Urlin the template connection profile, leaving other keys unchanged.<!DOCTYPE plist PUBLIC "-//Apple//DTD PLIST 1.0//EN" "http://www.apple.com/DTDs/PropertyList-1.0.dtd"> <plist version="1.0"> <dict> … <key>OAuth Redirect Url</key> <string>com.googleusercontent.apps.NUMBER-ID:oauth</string> <key>OAuth Client ID</key> <string>NUMBER-ID.apps.googleusercontent.com</string> </dict> </plist>
OAuth Redirect Url. Use the reverse notation of the OAuth Client ID and append:oauthto it.OAuth Client ID. Override the registered application OAuth Client ID.
Based on the credentials shown in step 11 the correct configuration would look like this:
<!DOCTYPE plist PUBLIC "-//Apple//DTD PLIST 1.0//EN" "http://www.apple.com/DTDs/PropertyList-1.0.dtd">
<plist version="1.0">
    <dict>
        <key>Protocol</key>
        <string>googledrive</string>
        <key>Vendor</key>
        <string>googledrive_custom</string>
        <key>Description</key>
        <string>Google Drive Custom OAuth Client ID</string>
        <key>Default Hostname</key>
        <string>www.googleapis.com</string>
        <key>OAuth Authorization Url</key>
        <string>https://accounts.google.com/o/oauth2/auth</string>
        <key>OAuth Token Url</key>
        <string>https://accounts.google.com/o/oauth2/token</string>
        <key>Scopes</key>
        <array>
            <string>https://www.googleapis.com/auth/drive</string>
        </array>
        <key>OAuth Redirect Url</key>
        <string>com.googleusercontent.apps.293168482058-dvjk8lh6u6n43kio156uerkqcgjl2i5k:oauth</string>
        <key>OAuth Client ID</key>
        <string>293168482058-dvjk8lh6u6n43kio156uerkqcgjl2i5k.apps.googleusercontent.com</string>
    </dict>
</plist>
Double-click the connection profile to open and register or copy to the Profiles folder in the application support folder.
Update Protocol Selection in Bookmark
The saved profile will be available in the Protocol section of the bookmark configuration.