User Interface
User Interface
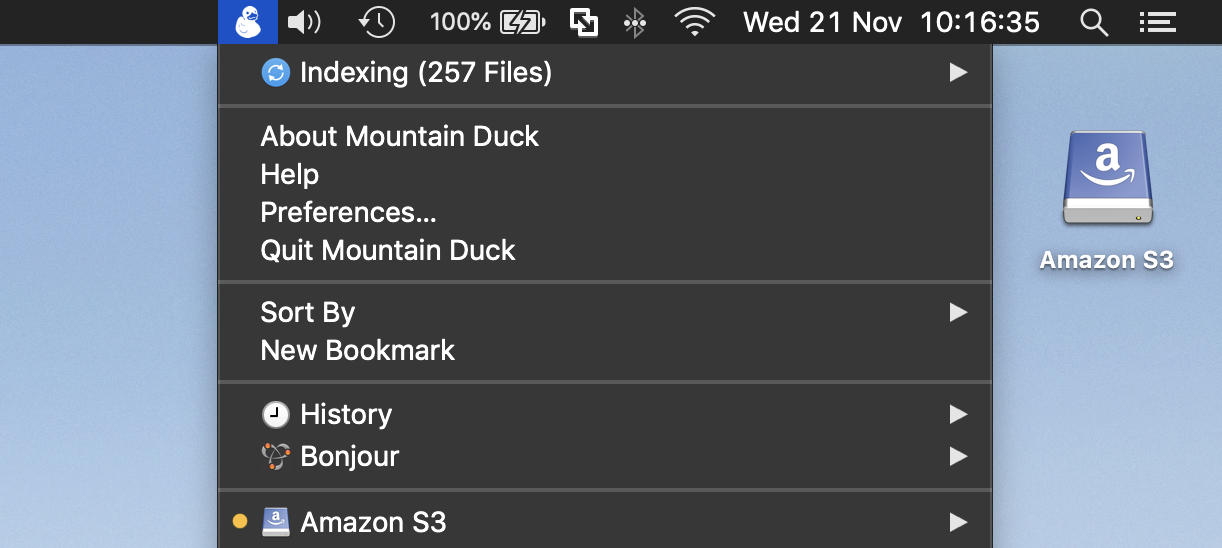
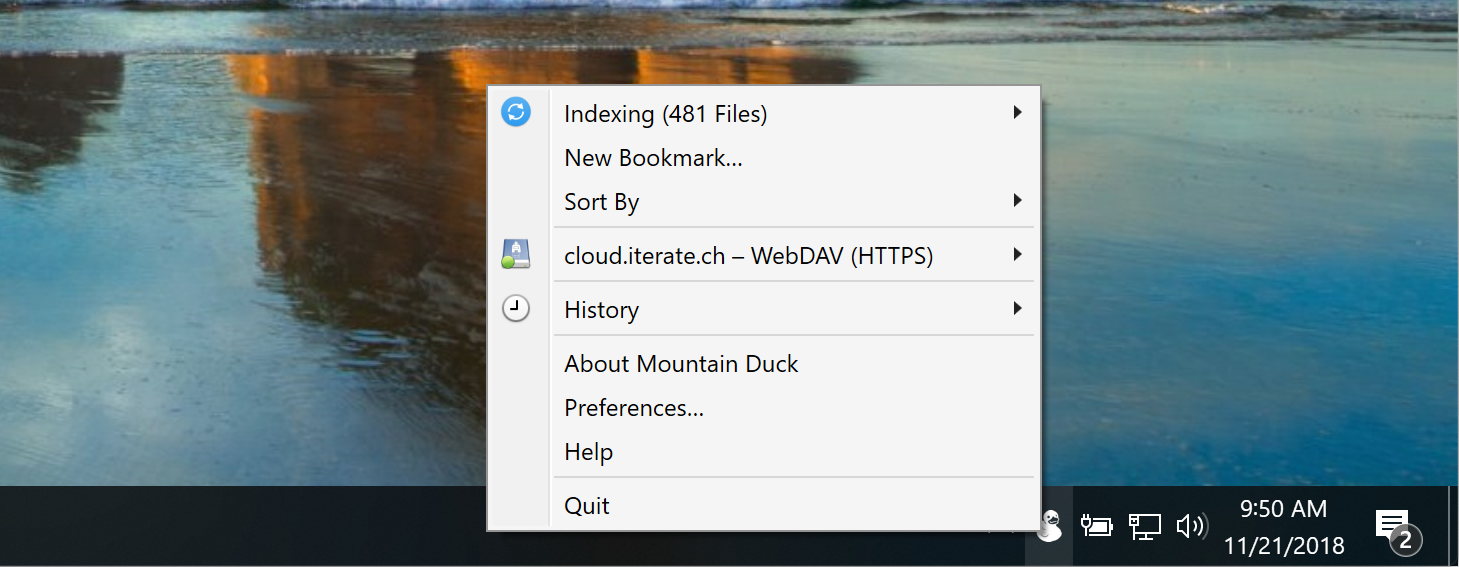
Mountain Duck runs in the status bar (macOS) and taskbar (Windows).
Find the mounted volume in Finder. Choose Go → Computer or choose Finder → General → Show these items on the desktop: Connected servers to make it appear on your desktop.
Note
Make sure Mountain Duck is enabled in System Settings → Menu Bar → Allow in the Menu bar
Tip
Make sure there is enough space left on right side of the notch or application menu items to make sure the Mountain Duck is visible in the the system status bar. To rearrange status menus, press and hold the Command key while you drag an icon. When having multiple displays attached to your computer the status bar item may not be visible on the main display but on the secondary display.
Right-click on the taskbar and select Taskbar setting → Notification area → Select which icons appear on the taskbar. Make sure Mountain Duck is selected in the list.
Tip
If Mountain Duck is newly installed on a Windows 11 system, the tray icon must be revealed manually in System Preferences → Personalization → Taskbar → Other system tray items.
Auto Start
You can choose to automatically open Mountain Duck when logging in. Refer to Preferences. Re-opening the application will open previously mounted volumes. If you choose Enable Login Item and Save Workspace in Preferences → General and do not manually eject the volume prior to reboot it will reconnect after login.
Bookmarks
Choose Open Connection… to add a new bookmark. To edit the connection settings of an existing bookmark, choose
Note
Bookmarks are shared between Cyberduck and Mountain Duck.
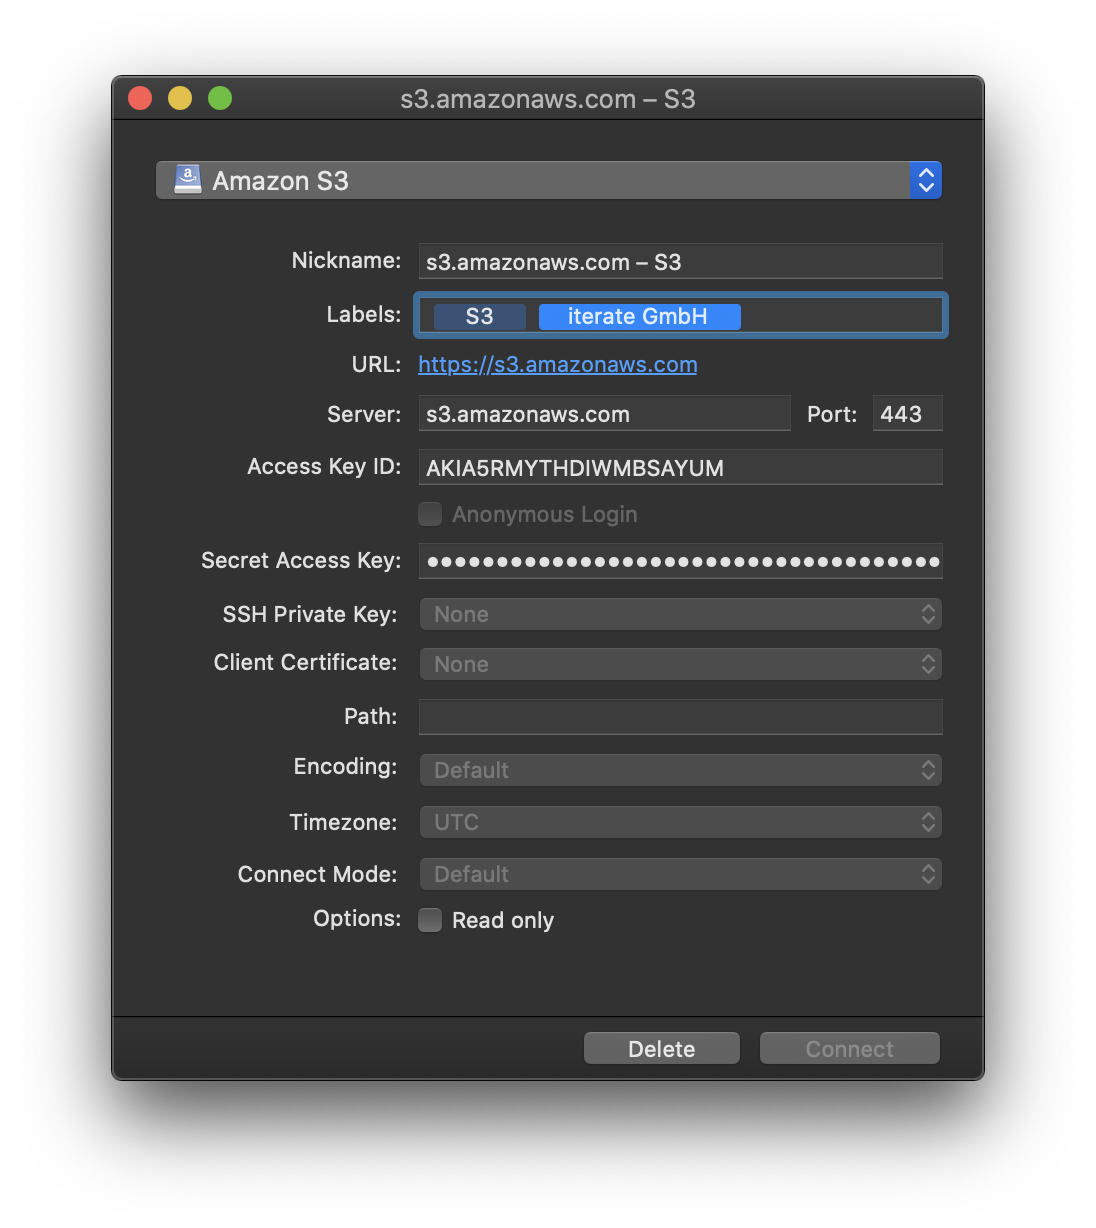
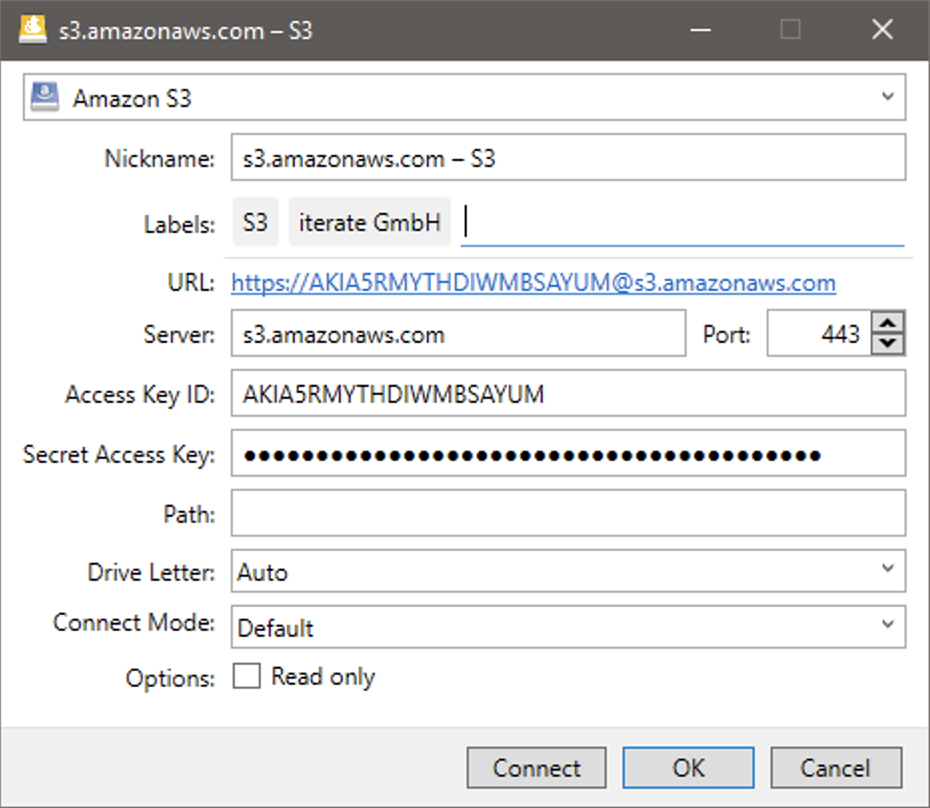
Nickname
The nickname determines the display of the bookmark in the menu and can be customized.
Tip
The nickname determines the name of the mounted volume in Finder.app on macOS or drive in File Explorer on Windows. Also refer to Mount Location.
Labels
Assign multiple labels to bookmarks. Bookmarks are grouped in folders in the status bar menu by their assigned labels.
Connect Mode
You can change the synchronization options for a bookmark with Connect Mode. Choose Default to use the setting from Preferences → Sync. The Online and Smart Synchronization connect modes mount a volume like a network attached disk. The Integrated connect mode synchronizes files and folders from a directory on the local disk with support from macOS and Windows.
Default: Use setting from Preferences
Online: Do not synchronize any file to your computer. See Online connect mode.
Smart Synchronization: See Smart Synchronization connect mode.
Integrated: See Integrated connect mode.
Windows Store
The connect mode Online and Smart Synchronization are not supported in Mountain Duck available from the Windows Store.
Online
Do not synchronize any file to your computer. You can only access this volume when a connection is possible to the server or cloud storage. Files are accessed on demand from the remote when opened and do not take up any local disk space.
Smart Synchronization
Directories can be browsed when offline and files opened are made available for later offline access. Upload changes in the background when server is reachable. You can explicitly make files available offline using the context menu. See Smart Synchronization.
Integrated
Version 5
Mountain Duck 5 required for Integrated connect mode.
Local storage is managed by the operating system. The mount is not seen as a remote volume by applications but as a regular folder on disk. This option uses the tightly integrated File Provider (macOS) and Cloud Files (Windows) APIs.
Read-Only Volume
Select Options: Read Only in the bookmark to mount the volume as read-only and disallow any write operations on the remote disk.
Drive Letter (Windows)
Always assign the same drive letter to the mounted volume.
Note
The number of concurrent connected bookmarks is limited by the number of available drive letters. You can have a total of 26 drives on your system.
Filter
You can search for bookmarks with the filter input field in the menu. Bookmarks not matching the input are greyed out.
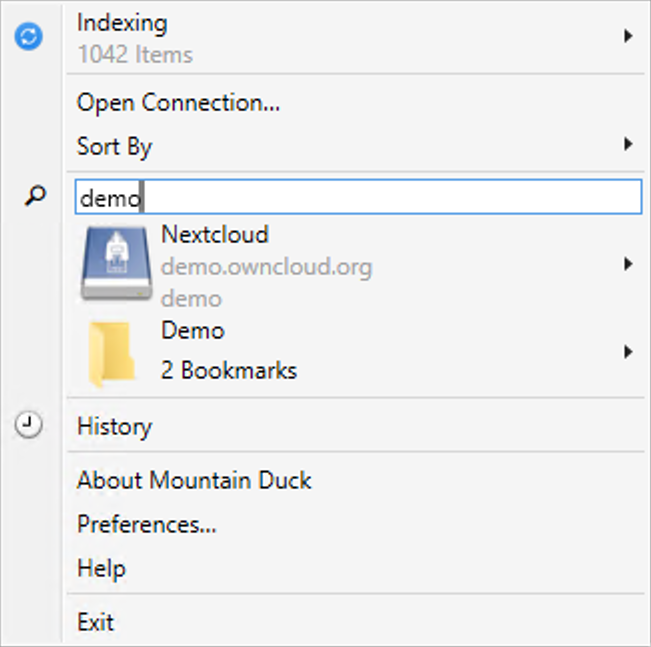
Bookmark Status
The bookmark can show three different status lights:
No light: No current connection to this bookmark.
Green light: Currently connected to this bookmark. The bookmark is completely synced and idle.
Orange light: Currently connected to this bookmark. There is at least one active process.
You can can put the currently connected bookmarks on top of the bookmark list regardless of the sorting by using a hidden configuration option:
bookmark.menu.sort.connected=true
Connect
Choose
Tip
You can just select the menu item with the bookmark name to connect, too. If you are already connected, selecting the menu item will reveal the volume in Finder.app.
Connect Using the Command Line Interface
You can mount volumes using your command-line interface (CLI) by opening a bookmark file.
Use
open -a "Mountain Duck" ~/Library/Group Containers/G69SCX94XU.duck/Library/Application Support/duck/Bookmarks/*.duck in Terminal.app
Enter the command <path to Mountainduck.exe> %AppData%/Cyberduck/Bookmarks/<Bookmarkfile> in cmd.exe.
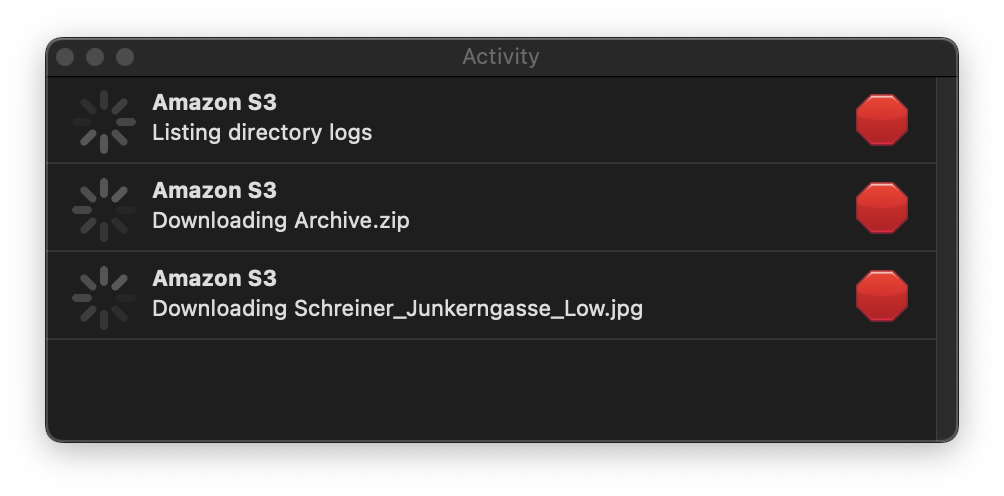
Activity
Version 5
Mountain Duck 5 required.
Track and cancel currently running sync operations in the Activity panel from the submenu in the status bar menu. It shows all running operations on files, pending sync tasks as well as any pending mount process.
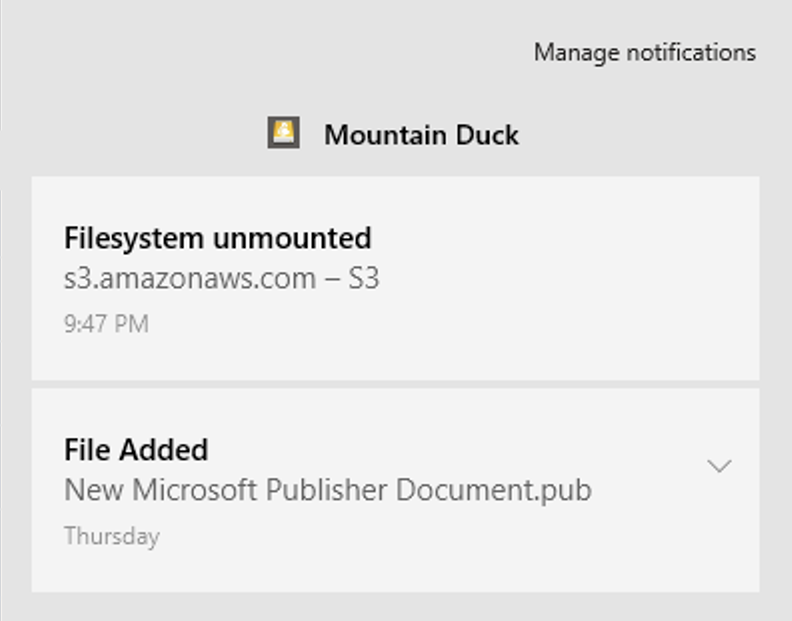
Notifications
Notifications of the connection status are posted to the Notification Center of the operating system.
Filesystem mounted
Filesystem unmounted
Errors: If there is a network connectivity issue while the remote server is mounted, an alert is displayed that allows you to retry the connection or disconnect and unmount the volume.
Disconnect
Choose
Choose File → Eject in Finder.app for the selected volume or control click to choose Eject.
Disconnect using command line
You can unmount volumes using your command-line interface (CLI). Use umount <bookmark nickname> in Terminal.app.
In File Explorer in “This PC” view or the sidebar on the left of the File Explorer window, open the context menu for your mounted drive and select Disconnect.
Disconnect using command line
You can unmount volumes using your command-line interface (CLI). Use net use <drive letter>: /delete in cmd.exe
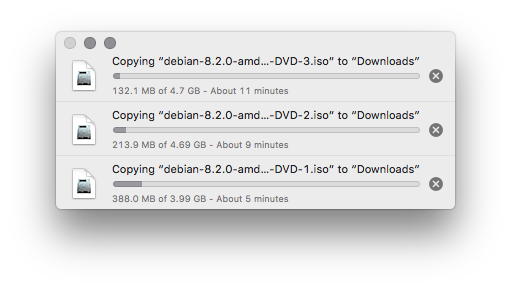
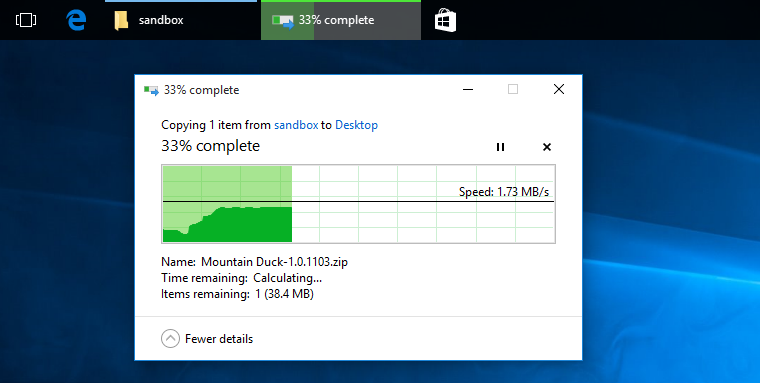
Copying Files
Drag files in Finder.app an macOS or File Explorer on Windows to move and copy files. You can also access the mounted volume with any other application and command-line interface.
macOS only
Using Integrated connect mode, files dragged are moved by default instead of copied. Drag the file with the ⌥ key pressed (macOS) to copy instead.
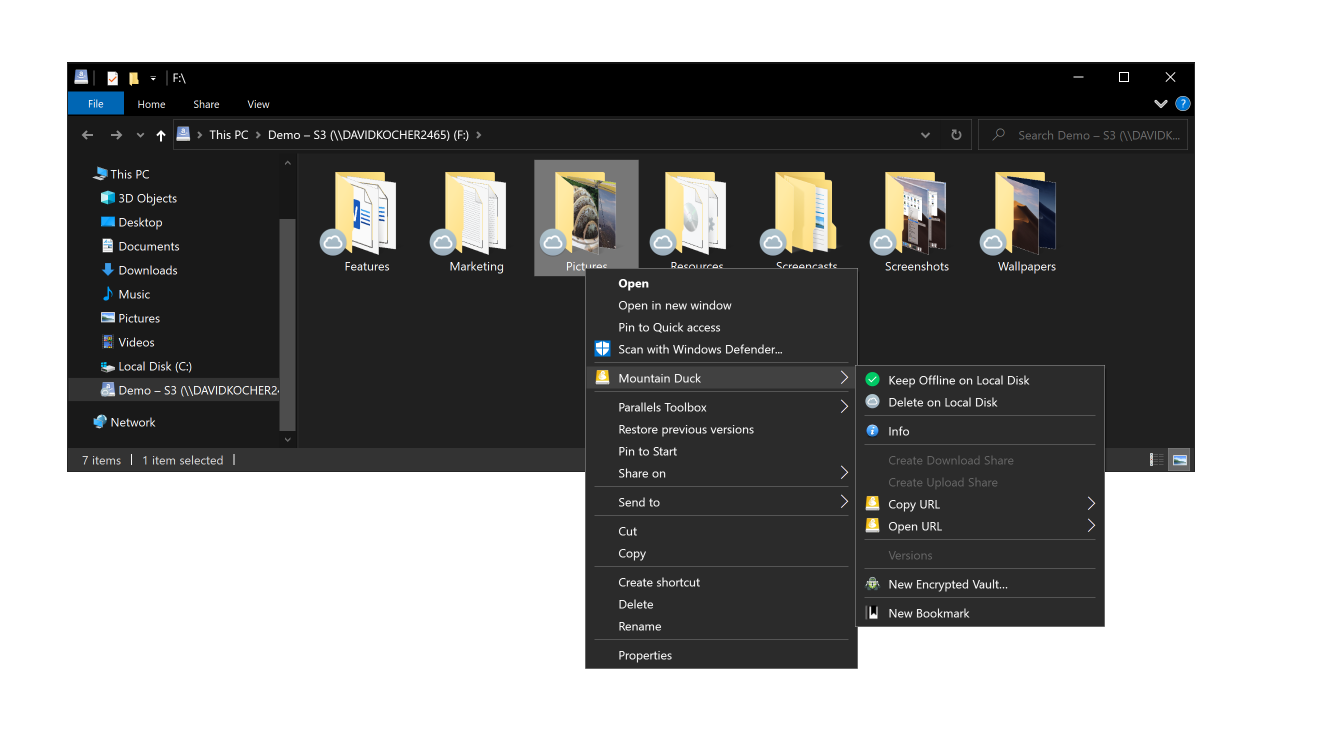
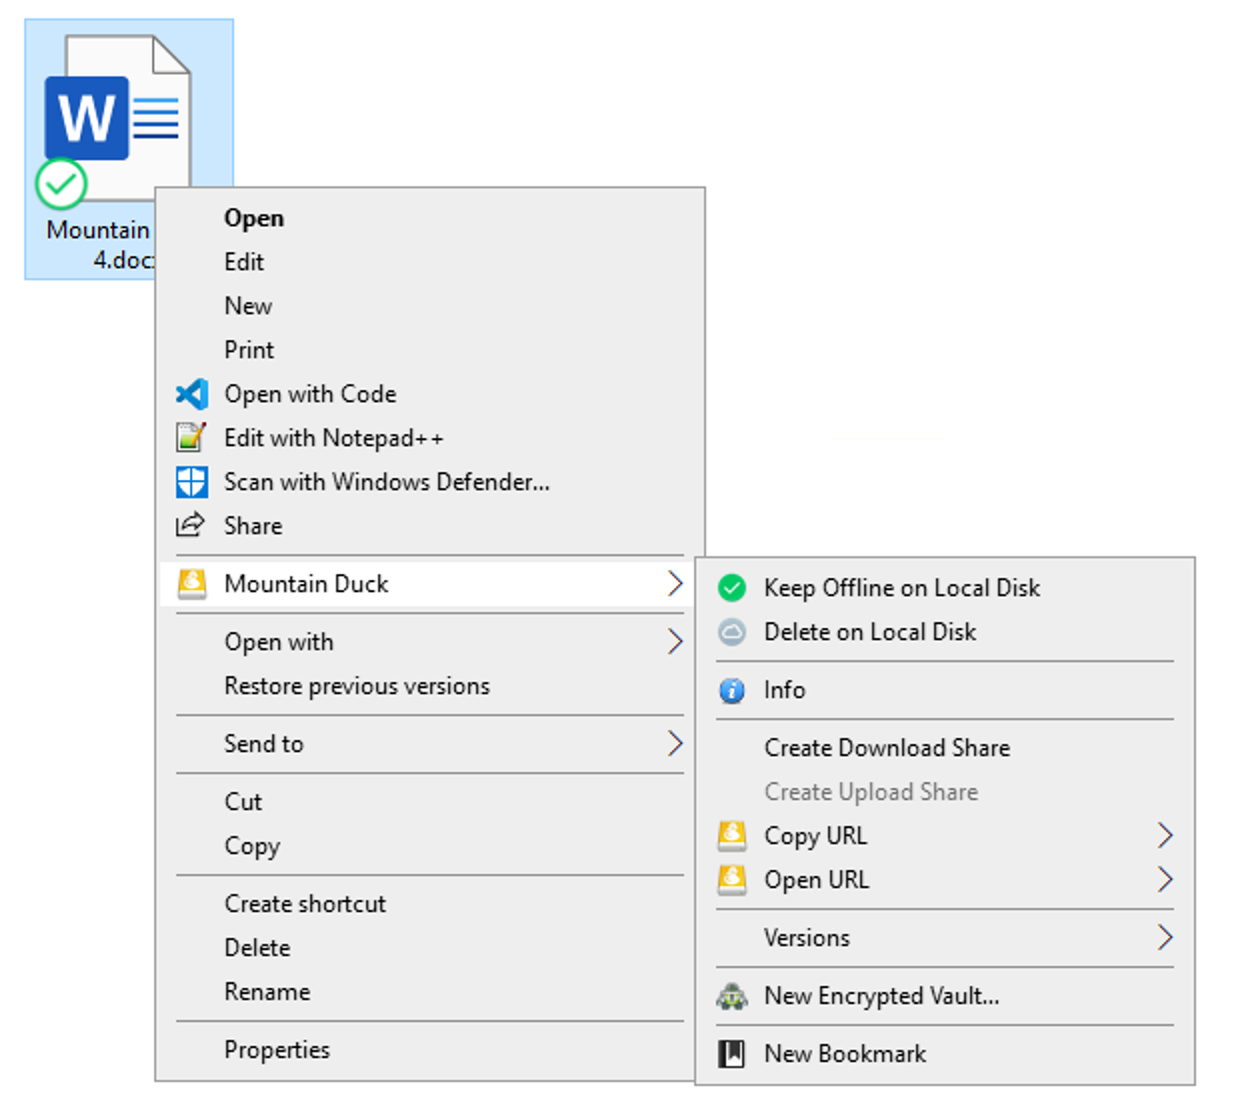
Context Menu in Finder and Windows File Explorer
A context menu in Finder on macOS and File Explorer on Windows allows various actions on files.
macOS only
Please make sure to enable the Mountain Duck Integration in System Preferences → Extensions → Finder Extensions. For macOS Ventura and later, the setting can be found in System Settings → Privacy & Security → Extensions → Added Extensions.
Sync Options
Keep Offline on Local Disk or Delete on Local Disk to manage caching status. Refer to Sync Options.
Reload
Changes from the server are not immediately visible. The folder listing in the file browser may become outdated when another application adds, removes, or modifies files on the server. Mountain Duck periodically polls for changes for open folders in Finder.app on macOS or File Explorer on Windows about every minute in both Online and Smart Synchronization connect modes. Choose Reload from the context menu to refresh the directory listing.
Windows only
Use F5 in File Explorer to refresh the folder listing.
Tip
Enable the Index Files option in Preferences → Sync to allow new files on the remote storage to be detected periodically for previously opened directories regardless of any open window for the folder in Finder.app on macOS or File Explorer on Windows in Smart Synchronization connect mode.
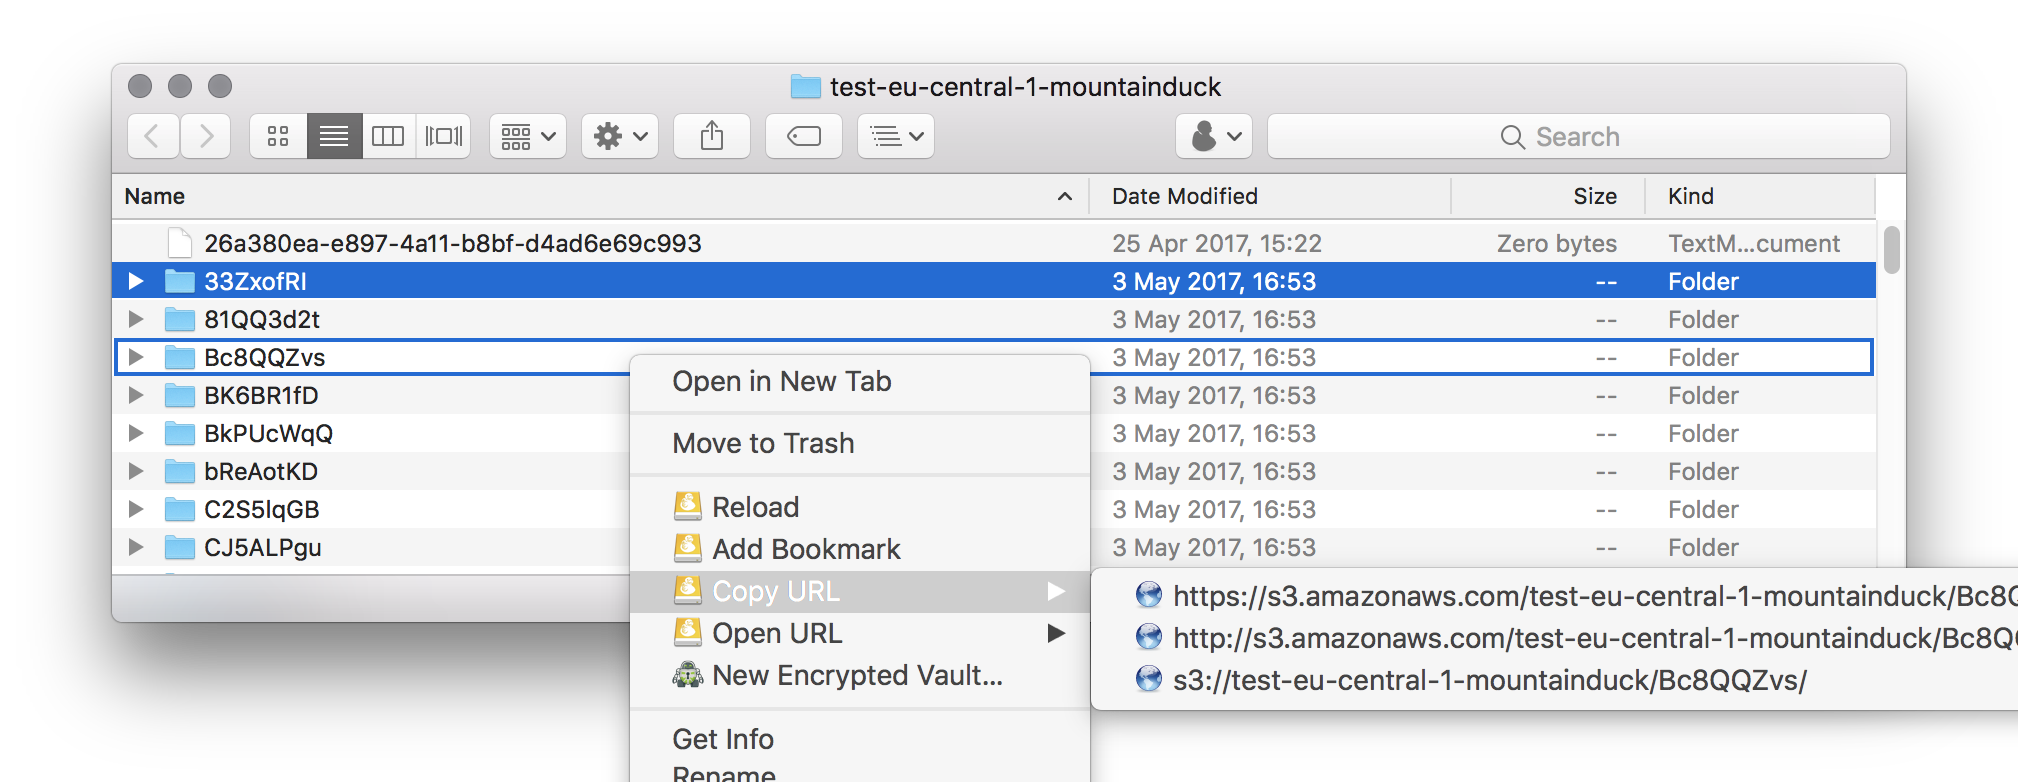
Share
Share…: Create an URL to share with someone else to allow downloading the file or folder.
Request file…: Create an URL to share with someone else to allow uploading files to the selected folder.
Right-click files on a mounted drive will open a menu with items to copy & open HTTP URLs or create share links of files. This will include the Origin URL, HTTP URLs and temporary signed URLs in S3.
Copy URL
Open URL
Read more about sharing options.
Versions
Quick Look or Restore previous versions of documents on servers supporting versioning. Read more about versioning.
New Bookmark
Right-click on white space within the mounted drive in Finder or Explorer to add a bookmark including the selected path.
Open in Terminal
Right-click on a folder and choose Open in Terminal to open an SSH connection to the server in Terminal for SFTP bookmarks.
Mac App Store
The setting is not available in the version installed from the Mac App Store. Refer to #7664.
Info Panel
Right-click on a file and choose Info to change permissions, ACLs, metadata, and other service provider-specific settings on a file. Refer to Info Window.
New Encrypted Vault…
Create a new Cryptomator Vault. Read more about client-side encryption.
Lock/Unlock Vault
Lock or unlock a Cryptomator Vault.
Usage Scenarios
Mirror Files to Remote Server or Cloud Storage with rsync
Use rsync or any other of your preferred tools to mirror files for example to an S3 bucket. Set the --timeout=TIME option in rsync (in seconds) if you have low bandwidth or high latency connection.
Open Remote Files in Text Editor
Sublime Text and other editors allow you to open folders to work on multiple files.
Create ZIP Archive of Files on FTP Server or Cloud Storage
Use your preferred archive utility to create a compressed archive of files already stored on the server.