SFTP

Providers
Settings are specific to service providers.
Note
Connection profiles can be installed from Preferences → Profiles.
Connecting
If you have access to a server using a secure shell (SSH2), most probably sftp-server is also installed and configured, and you can connect using SFTP.
OpenSSH Configuration Interoperability
Public Key Fingerprints
Public key fingerprints are checked against and written to ~/ssh/known_hosts when accepted. This does not apply to the Mac App Store version which does store key fingerprints in the preferences.
Configuration File
The following configuration options from ~/.ssh/config are supported for SFTP connections:
IdentityFile for public key authentication.
IdentityAgent for public key authentication. Specifies the UNIX-domain socket used to communicate with the authentication agent.
HostName aliases.
User preference for login credentials.
ProxyJump to connect via SSH tunnel through bastion server.
PreferredAuthentications to limit authentication methods tried to login.
IdentitiesOnly. Only try explicitly set private keys to authenticate but not all identities found in SSH agent. Resolves Too many authentication failures errors with servers limiting the number of attempted authentication requests.
A bookmark will update its public key authentication setting from the IdentityFile configuration in
~/.ssh/config. Also when opening a new connection using File → Open Connection…, IdentityFile and User parameters in the OpenSSH user config file are auto completed.
Example ~/.ssh/config configuration:
Host myhostname
	User myusername
	IdentityFile ~/.ssh/mykey-rsa
To use the same key for all hosts add a wildcard entry such as
Host *
	IdentityFile ~/.ssh/mykey-rsa
which is then used when configuring a new bookmark.
Important
If you have a configuration in your ~/.ssh/config make sure to specify the Host alias as Server in your bookmark configuration. This is important for cases the Host alias is different from the HostName:
Host myhostalias
	HostName myverylonghostname.example.com
	User myusername
	IdentityFile ~/.ssh/mykey-rsa.pub
For the configuration above set myhostalias in the Server field when editing a bookmark.
Default Public Key Authentication Keys
You can enable the use of a default set of keys ~/.ssh/id_rsa and ~/.ssh/id_dsa (in this order) by setting the hidden configuration option ssh.authentication.publickey.default.enable to true.
ssh.authentication.publickey.default.enable=true
Public Key Authentication
Private keys to authenticate with can be selected in the Bookmark or Connection panel.
Tutorial
Follow the step-by-step instructions to configure public key authentication with an OpenSSH server.
PuTTY Key Format Interoperability
PuTTY private keys (.ppk) are supported for rsa key types. ed25519 is not supported.
OpenSSH Key Format Interoperability
OpenSSH private keys of type rsa, dsa, ecdsa and ed25519 (in OpenSSL PEM format) are supported. The new OpenSSH format (openssh-key-v1) is only supported for ecdsa and ed25519.
OpenSSH User Certificate Authentication
Applies to SSH servers, which are configured with TrustedUserCAKeys, refer to your software vendor for configuration. To configure authentication with a User CA signed private key, configure the private key as described in Configure Public Key Authentication step 3. The signed public key file must reside next to the private key file, suffixed -cert.pub or .pub. The CertificateFile configuration directive in ~/.ssh/config is not supported. Pay attention to the server configuration and PubkeyAcceptedAlgorithms specifically which determines the allowed private key algorithms to authenticate with.
Public Key Authentication Using SSH Agent
When connecting to a SSH server, Cyberduck will lookup matching private keys from the SSH agent when attempting to authenticate with the server if no password is available and no explicit private key to use is configured in the bookmark.
Mac App Store
The setting is not available in the version installed from the Mac App Store. Refer to #13945.
The agent ssh-agent is running by default on macOS. You add private key identities to the authentication agent using the program ssh-add. The SSH agent is located using the IdentityAgent directive in ~/.ssh/config or if missing from the environment variable SSH_AUTH_SOCK.
The following agents are supported:
OpenSSH
ssh-agent.
Example ~/.ssh/config configuration for 1Password:
Host myhostname
    # 1Password SSH agent
	IdentityAgent ~/.1password/agent.sock
Example ~/.ssh/config configuration for Bitwarden:
Host myhostname
    # Bitwarden SSH agent
	IdentityAgent ~/.bitwarden-ssh-agent.sock
The following agents are supported:
Pageant. Refer to How To Use Pageant to Streamline SSH Key Authentication with PuTTY.
OpenSSH for Windows using the pipe (
\\.\pipe\openssh-ssh-agent) by default. UseIdentityAgentto set a custom socket path for any other compatible agent if needed.
Tip
When authenticating using Public Key Authentication with an SSH agent containing multiple identities, add IdentitiesOnly yes in ~/.ssh/config to limit authentication attempts with this identity only. Otherwise, the server may deny the connection because of too many login failures, and you will receive the error Too many authentication failures.
Since the private key is not always available on the filesystem, specifying a public key as IdentifyFile is also supported. This is particularly useful when the private key is saved in a password manager and only exposed by a custom SSH agent.
Example ~/.ssh/config configuration:
Host myhostname
	User myusername
	IdentityFile ~/.ssh/mykey-rsa.pub
	IdentitiesOnly yes
Alternatively you can select the public key file in the bookmark configuration.
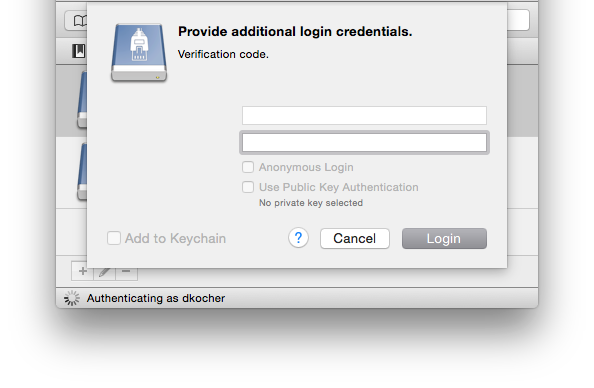
One-Time Passcodes (2FA)
Using a challenge-response authentication with one-time password generators such as DUO, SecurID or Google Authenticator is supported. After the initial login prompt for the username and password, a second login prompt is displayed to enter the one-time passcode.
Google Authenticator
A setup with a two-step verification such as Google Authenticator is supported.
Use the following configuration steps:
Install
libpam-google-authenticatoron the server.Run
google-authenticatorto create a new account and scan the 2D barcode using the Authenticator application on your phone. Refer to Install Google Authenticator.Make it required for SSH logins by running
echo 'auth required pam_google_authenticator.so' >> /etc/pam.d/sshd.Add
ChallengeResponseAuthentication yesto/etc/ssh/sshd_configwithecho 'ChallengeResponseAuthentication yes' >> /etc/ssh/sshd_config.
When logging in, enter the time-based token requested after providing username and password.
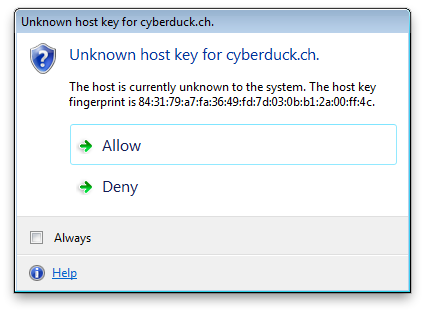
Verify Host Keys
Upon connecting to an SSH server for the first time, you will see a message to verify the host key uniquely identifying the server. You can ask your provider for the public fingerprint of the server to make sure you are connecting to the right host. Subsequent connections to the SSH server will make sure that the host key does not have changed to prevent spoofing attacks.
Connect via SSH Tunnel Through Bastion Server
Important
Cyberduck 7.7 or later required
Using the ProxyJump configuration directive in ~/.ssh/config you can connect through a tunnel. The bookmark configuration refers to the target host in the internal network. We should find a ProxyJump directive in the OpenSSH configuration ~/.ssh/config matching the hostname in the bookmark.
Sample configuration:
Host internal
   	HostName server.lan
   	ProxyJump user-external@jump.example.org:2222
   	User user-internal
You can also work with aliases like
Host bastion-host-nickname
    HostName bastion-hostname
    User username
    Port 2222

Host remote-host-nickname
    HostName remote-hostname
    ProxyJump bastion-host-nickname
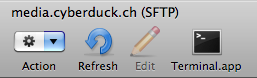
Open in Terminal
Open in Terminal allows you to open an SSH shell for the current working directory with a single click.
Mac App Store
The setting is not available in the version installed from the Mac App Store. Refer to #7664.
Terminal.app
Use View → Customize Toolbar… to add the Terminal.app toolbar icon to your browser.
Customize SSH Command:
You can change the SSH command using the hidden configuration option
terminal.command.ssh=\"ssh\ -t\ {0}\ {1}@{2}\ -p\ {3}\ \\\"cd\ {4}\ \&\&\ exec\ \\\\\$SHELL\\\"\"
where
{0} is
-i <path to the private key>{1} is the username from the login credentials
{2} is the hostname
{3} is the port number of the remote host
{4} is the current working directory in the browser
Because of all the escaping of characters, it might be easier to edit the key using Property List Editor if you have the developer tools installed. You can then set the string for the key terminal.command.ssh to ssh -t {0} {1}@{2} -p {3} "cd {4} && exec \$SHELL". Test the string in Terminal.app first if it is valid.
Using iTerm2
Version 7.4 and later:
No configuration change is required. Choose iTerm2 → Make iTerm2 Default Term and restart Cyberduck. To revert, set the default application for a file named .command to Terminal.app in Finder → Info → Open With….
Previous versions:
You can change a hidden configuration option to use a third-party terminal application instead of Terminal.app.
Example for iTerm2 Version 2
defaults write ch.sudo.cyberduck terminal.bundle.identifier com.googlecode.iterm2
defaults write ch.sudo.cyberduck terminal.command \"set\ t\ to\ \(make\ new\ terminal\)\\ntell\ t\\nset\ s\ to\ \(launch\ session\ \\\"Default\ Session\\\"\)\\ntell\ s\\nwrite\ text\ \\\"{0}\\\"\\nend\ tell\\nend\ tell\"
Example for iTerm2 Version 3
defaults write ch.sudo.cyberduck terminal.bundle.identifier com.googlecode.iterm2
defaults write ch.sudo.cyberduck terminal.command \"set\ t\ to\ \(create\ window\ with\ default\ profile\)\\ntell\ t\\nset\ s\ to\ \(current\ session\)\\ntell\ s\\nwrite\ text\ \\\"{0}\\\"\\nend\ tell\\nend\ tell\"
To reset to the default settings use:
defaults delete ch.sudo.cyberduck terminal.bundle.identifier
defaults delete ch.sudo.cyberduck terminal.command
Disable WSL
There is a hidden configuration option for toggling additional SSH-terminal applications. Currently implemented are ssh.exe (OpenSSH built-in to Windows 10 since version 1709), bash.exe (using WSL and invoking ssh there) as well as PuTTY.
Disabling OpenSSH:
terminal.openssh.enable=falseDisabling WSL:
terminal.windowssubsystemlinux.enable=false
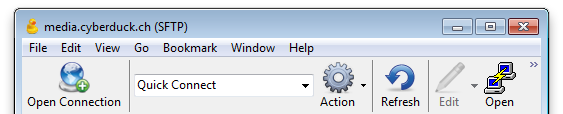
PuTTY.exe
Use View → Customize Toolbar… to add the Open in Putty toolbar icon to your browser.
Location of the PuTTY installation:
By default, the executable putty.exe must be located in your user home folder. You can change the install location by editing the hidden configuration option terminal.command.ssh to point to the path of the executable.
Distribution (CDN)
You can enable custom origin Amazon CloudFront (Content Delivery Network) distribution using File → Info → Distribution (CDN).
Create and Expand ZIP or TAR Archives
The remote systems must have the archiving tools tar or zip installed respectively. Use View → Customize Toolbar… to add the Archive toolbar button to your browser window. It is not included in the default toolbar configuration.
Note
Send custom commands and Create and expand ZIP/TAR Archives are limited to FTP and SFTP.
Archive
Select one or more files to archive in the browser. For multiple files, a file with the name Archive with the given extension of the archive format will be created.

Expand
Select one or more files to expand in the current working directory.
Remote Commands
You can send any remote command to a remote SSH server. This is for example useful if you want a HTTP server to reload its configuration or changing the ownership of files using chown on a UNIX system.
Note
The current working directory is always your use home. Determine using pwd to get the absolute path.

Preferences
Default Protocol Handler
You can set Cyberduck or a third-party application as the default application (protocol handler) for SFTP in Preferences → SFTP. When you click URLs in another application like your web browser, this application is opened to open the URL instead.
Supported Algorithms
Ciphers
aes{128,192,256}-{cbc,ctr}, blowfish-{cbc,ctr}, 3des-{cbc,ctr}, twofish{128,192,256}-{cbc,ctr}, twofish-cbc, serpent{128,192,256}-{cbc,ctr}, idea-{cbc,ctr}, cast128-{cbc,ctr}, arcfour, arcfour{128,256}, aes{128,256}-gcm@openssh.com, chacha20-poly1305@openssh.com
Key Exchange
diffie-hellman-group1-sha1, diffie-hellman-group14-sha1, diffie-hellman-group14-sha256, diffie-hellman-group15-sha512, diffie-hellman-group16-sha512, diffie-hellman-group17-sha512, diffie-hellman-group18-sha512 diffie-hellman-group-exchange-sha1, diffie-hellman-group-exchange-sha256, ecdh-sha2-nistp256, ecdh-sha2-nistp384, ecdh-sha2-nistp521, curve25519-sha256@libssh.org
SSH Key Types
ssh-rsa, ssh-dss, ecdsa-sha2-nistp256, ecdsa-sha2-nistp384, ecdsa-sha2-nistp521, ssh-ed25519, rsa-sha2-256, rsa-sha2-512
SSH Certificate Key Types
ssh-rsa-cert-v01@openssh.com, ssh-dss-cert-v01@openssh.com, ecdsa-sha2-nistp256-cert-v01@openssh.com, ecdsa-sha2-nistp384-cert-v01@openssh.com, ecdsa-sha2-nistp521-cert-v01@openssh.com, ssh-ed25519-cert-v01@openssh.com
Compression
Compression with zlib and zlib@openssh.com is supported.
Private Key Files
pkcs5, pkcs8, openssh-key-v1
Incompatibilities
Serv-U MFT
Serv-U MFT does not fully implement SFTPv3. Files cannot be created, renamed, uploaded as a required flag is not implemented and results in error messages.
Known Issues
Too Many Authentication Failures
Running an SSH agent with many added identities can lead to the server error Too many authentication failures when trying to authenticate with all available identities.
Select the identity in the bookmark with SSH Private Key.
Increase the allowed authentication tries on the server by adjusting
MaxAuthTries.
Possible remedies using configuration in OpenSSH configuration file:
IdentitiesOnlyin client configuration file~/.ssh/config. Only try to authenticate with explicitly set private key instead of all identities retrieved from SSH agent.Set
PreferredAuthenticationsin client configuration file~/.ssh/configto disable public key authentication for example.
Illegal SFTP Packet Length: Invalid packet: indicated length 1114795883 too large
The error message Invalid packet: indicated length 1114795883 too large may indicate you have either:
An
echostatement in your shell init script like .bashrc. Make sure it does not output any text.Interoperability issue with Globalscape EFT Server (Issue #5308).
Possibly the server is printing a message similar to Please login as the ubuntu user rather than root user. Please verify the username for your connection.
Enable SSH access on your server. Use the sftp command in a terminal to verify
sftp username@domain_name. It’ll ask for your password. If you don’t have SSH access, you’ll get “Received message too long”, hence the error message.
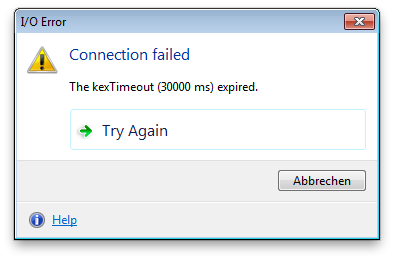
Kex Timeout
This error can occur if you are connecting the first time to a device with a slow processor. You can raise the tmeout value in Preferences → Connection → Timeout.
Malformed known_hosts
Cyberduck refuses to connect if there are malformed entries in your known_hosts file located under ~/.ssh. Renaming this file and recreating it usually resolves this. An alternative requires manually editing the known_hosts file removing all malformed entries. Please refer to sshd(8) for a valid format.
Mountain Duck
Symbolic Link not Accessible
Symbolic links are only resolved as such when the target points to a location on the mounted volume.
Symlinks can only be displayed as such if the target is pointing to a location on the mounted volume. Otherwise, they are displayed as a regular file or folder.
Symlink is displayed as a regular file or folder.
File Permissions Reset when Saving File
macOS
Mountain Duck will forward all permission changes from Finder or any other application to the SFTP server. There is a hidden configuration option fs.setattr.chmod=false to disable the writing of permissions.
File Owner Reset When Saving File
macOS
Some editors save files using an Atomic Save feature that writes changes to a file to a temporary file later replacing the edited file by renaming the temporary file to the name of the edited file. This works well on local filesystems, where there is support to retain the owner of the file that is different from the editing user using a special function call. This does not work for volumes mounted with Mountain Duck and the file owner will be reset to the default owner for new files created on the server by the logged-in user. As a workaround, try to find a setting for the editor to disable the Atomic Save feature.
See also
Free Space Calculation is Incorrect
The available space for a volume mounted over SFTP is determined using quota features of the SSH protocol. Technically using the space-available extension of the SFTP protocol or the statvfs@openssh.com extension from OpenSSH. If the connected device returns an invalid value (e.g. from the disk the server is running instead of the data disk) you will get an incorrect calculation for the free space. You can work around the issue using one of the following options:
Set a default path you want to connect to within the bookmark Path option.
Disable the feature in Mountain Duck by setting the hidden configuration option
fs.quota.enable=false.